-

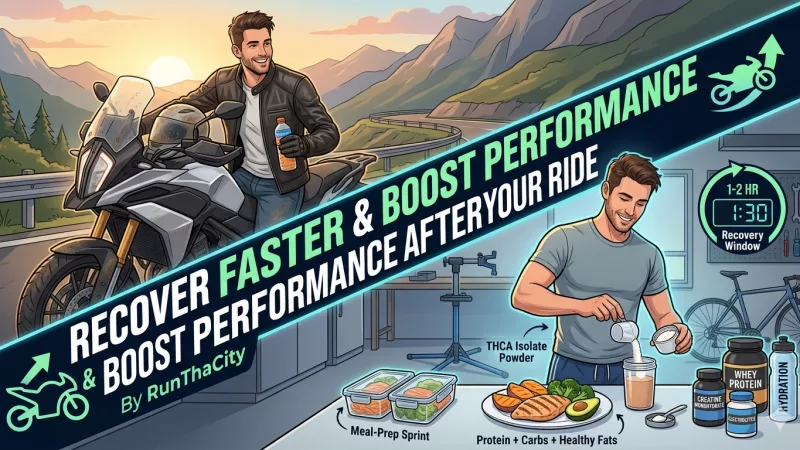
How to Recover Faster and Boost Performance After Your Ride
Motorcycle enthusiasts and fitness beginners often do the workout, finish the ride, and still get blindsided afterward by heavy legs, low energy, and sore muscles that linger longer than expected. The core tension is simple: training builds progress, but muscle repair challenges and shaky fueling choices can stall it right when consistency matters most. Post-workout recovery nutrition doesn’t need to feel like a guessing game, and it can be the difference between dragging through the next session and showing up steady. A clear approach to recovery eating supports exercise performance enhancement.
Understanding What Your Body Needs After a Ride
Recovery nutrition works when you understand the “why,” not when you just copy a list. After a hard ride or gym session, your body needs to refill muscle glycogen for energy, rebuild muscle through muscle protein synthesis, and calm excess inflammation with nutrient-rich foods. Amino acids are the building blocks that make protein repair possible, so protein choices and supplements stop feeling like random add-ons.
This matters because the right refuel can mean steadier energy, less next-day stiffness, and better training consistency. It also helps you avoid common mistakes like only eating protein but skipping carbs, or chasing flashy powders while under-eating real food.
Think of it like post-ride maintenance. Glycogen is your fuel tank, amino acids are the replacement parts, and colorful whole foods act like the rust protection that keeps things running smoothly. With that logic clear, meal timing, macro balance, hydration, and supplement picks become repeatable.
Build a Repeatable Post-Ride Recovery Meal Plan
This process helps you plan what to eat and drink after a ride or workout so you recover faster, show up stronger tomorrow, and avoid the “random snack plus soreness” cycle. For riders who also train, it’s the simplest way to treat recovery like reliable maintenance: same steps every time, better performance over time.
-
Set your “first bite” window
Start with carbs plus protein within 1 to 2 hours after a hard session, and sooner if you trained fasted or rode long. The goal is to begin refilling energy and kick off repair while your body is primed to use it. The idea behind consuming carbs and protein is to make recovery feel smoother, not to force a shake after every easy spin.
-
Pick a protein target you can hit every time
Choose one simple rule and stick with it for two weeks: either aim for 25 to 40 g in your post-ride meal or use a bodyweight check. A practical benchmark is that muscles need 0.5 g of high-quality protein per kilogram of body weight after exercise, which helps you scale up or down without guessing.
-
Balance the plate for energy plus repair
Build your meal in three parts: a palm of protein, a fist or two of carbs, and a thumbs-up of healthy fats, then add a colorful fruit or vegetable. Carbs support your next session’s energy, while protein handles the rebuild, and the produce adds micronutrients that help you feel less beat up.
-
Hydrate with a quick “loss check”
Start drinking right away and keep it steady for the next few hours, not just a single chug at the end. If your gear is salty, your jersey is crusty, or you weighed less after training, add sodium through an electrolyte drink or salty foods to help fluids actually stay in your system.
-
Use a simple supplement decision filter
Confirm food first, then choose supplements only if they solve a clear problem: convenience, low appetite, or hitting protein on busy days. Compare labels for single-purpose basics (whey or plant protein, creatine monohydrate, electrolytes) and skip “mega blends” that hide doses behind proprietary mixes.
Recovery & Nutrition Questions Riders Ask Most
Q: What are the top foods to eat immediately after a workout to speed up muscle recovery?
A: Aim for an easy combo of carbs plus protein so you refill energy and start repair without overthinking it. Try chocolate milk, yogurt with fruit, a turkey sandwich, or rice with eggs. If you cannot stomach much, go smaller and liquid, then eat a full meal later.
Q: How can supplements help reduce post-workout fatigue and improve overall performance?
A: Supplements can help when they solve a specific gap like low appetite, missed protein, or heavy sweating. Stick to simple, single-ingredient options and trial one at a time so you can tell what actually helps. If you take medications or have heart or kidney issues, clear any new supplement with a clinician first.
Q: What nutritional mistakes should I avoid that might slow down my recovery process after intense exercise?
A: The big ones are under-eating after long rides, skimping on fluids and salt, and relying on alcohol as your “recovery drink.” Another common trap is chasing soreness with random pills while ignoring sleep, calories, and protein consistency. Keep it boring: eat enough, hydrate steadily, and prioritize quality meals.
Q: How can I structure my post-workout nutrition to avoid feeling overwhelmed by too many supplement options?
A: Use a “food first, basics only” rule: one real meal, then only add a supplement if it fixes a repeat problem you can name. Start with a short list such as protein powder for convenience and electrolytes for hot-weather rides, then reassess after two weeks. Skip proprietary mega-blends so dosing stays transparent.
Q: How can I customize natural supplements like THCA isolate powder to enhance my post-workout recovery and manage muscle soreness effectively?
A: Keep nutrition as your main lever, then treat any isolate as optional experimentation for comfort, not a substitute for fueling and sleep. Those interested in refined THCA isolate products should still start low, change only one variable at a time, and confirm third-party lab results and local rules since some regions set strict limits such as CBD products must contain less than 0.2% THC to be legal. If you have a history of substance use concerns, a clinician can offer safer pathways like medications for opioid use disorder when pain management and recovery feel tangled.
Recovery Rituals That Stick After Every Ride
Recovery gets easier when you stop relying on willpower and start running a few repeatable routines. These practices help riders and gym-goers connect performance, basic bike care, and health so you feel better this week and build momentum all season.
10-Minute Cooldown Walk
- What it is: Walk or easy spin, then light leg and hip mobility.
- How often: After hard rides or training days.
- Why it helps: Lowers stiffness and makes the next session feel smoother.
Bottle-and-Backup Hydration System
- What it is: Keep one bottle on you and one pre-filled in the garage.
- How often: Daily, plus extra on hot ride days.
- Why it helps: Fewer headaches and cramps, better focus in the saddle.
Recovery Plate Rule
- What it is: Build a plate with protein, carbs, and a colorful produce side.
- How often: Within 2 hours after riding.
- Why it helps: Refuels muscles and reduces next-day sluggishness.
Weekly Meal-Prep Sprint
- What it is: Prep 3 to 5 portions, like 38g protein per meal tuna and sweet potato.
- How often: Weekly.
- Why it helps: Makes recovery eating automatic when you get home tired.
Sleep Lock-In Routine
- What it is: Set a consistent lights-out time and a 20-minute screen-off buffer.
- How often: Nightly.
- Why it helps: Treat sleep as performance-enhancing, like a training partner.
Post-Ride Bike Reset
- What it is: Quick chain check, tire pressure glance, and wipe down contact points.
- How often: After each ride.
- Why it helps: Prevents small problems from stealing your next workout.
Turn Post-Ride Recovery Into Sustained Performance and Endurance
It’s easy to ride hard, train hard, and then wonder why the next session feels heavier than it should. The way through isn’t more willpower, it’s a simple recovery mindset built on repeatable rituals: hydration, steady sleep, and applying nutrition knowledge so refueling happens on purpose, not by accident. When those systems are in place, soreness drops, energy becomes steady, and enhanced riding endurance shows up alongside sustained workout performance and fitness goal reinforcement. Recover like it’s part of training, and performance follows. Choose one recovery ritual to lock in today and repeat it after every ride. That consistency is what builds resilient health and dependable performance for the long run.
-
-
How to Find the Best Sportbike Salvage Yard Near You: Breathe New Life into Your Ride
For passionate sportbike riders, keeping their machines running smoothly and looking sharp is a constant pursuit. But the sting of repair costs can sometimes dampen the thrill of the ride. That’s where sportbike salvage yards come in, offering a treasure trove of used parts at a fraction of the price of new ones.
However, navigating the world of salvage yards can be daunting, especially for first-timers. This comprehensive guide will equip you with the knowledge and strategies to locate the best sportbike salvage yard near you and score the perfect parts for your motorcycle.
Key Takeaways:
- Sportbike salvage yards offer cost-effective, environmentally friendly options for finding used parts for your motorcycle.
- Consider factors like inventory, reputation, distance, and services offered when choosing a salvage yard.
- Utilize online directories, search engines, local communities, and word-of-mouth recommendations to find suitable yards.
- Prepare thoroughly before visiting, including calling ahead, gathering information, dressing appropriately, and potentially bringing tools.
- Inspect parts carefully, negotiate prices respectfully, and prioritize safety while navigating the salvage yard.
Comparison Table: New vs. Used Sportbike Parts
Feature New Parts Used Parts (Sportbike Salvage Yard) Cost Significantly higher Significantly lower Availability Readily available for most models Wider variety, potentially including hard-to-find parts for older models Environmental Impact Higher due to resource extraction and manufacturing Lower due to part reuse Quality Guaranteed brand new and undamaged May show signs of wear and tear, requiring careful inspection Warranty Typically covered by manufacturer warranty May or may not be offered by the salvage yard 
Why Choose a Sportbike Salvage Yard?
Why Choose a Sportbike Salvage Yard?
Here are some compelling reasons to consider a sportbike salvage yard for your repair needs:
- Cost-Effectiveness: Used parts cost significantly less than new ones, making them ideal for budget-conscious riders.
- Part Availability: Salvage yards often stock a wide variety of parts, including hard-to-find components for older models.
- Environmental Friendliness: Reusing existing parts reduces the demand for new materials and minimizes environmental impact.
- Project Potential: Salvage yards can be a goldmine for enthusiasts working on restoration projects or customizing their bikes.
Finding the Right Salvage Yard: Factors to Consider
Before venturing out, consider these factors to narrow down your search and find the best sportbike salvage yard for your needs:
- Inventory: Does the yard specialize in sportbikes, or do they offer parts for various motorcycle types? Knowing their focus helps ensure they have the specific parts you need.
- Reputation: Research online reviews and testimonials from other riders to gauge the yard’s reputation for quality parts, fair pricing, and customer service.
- Distance: Consider the travel distance and weigh it against the potential savings and availability of parts.
- Services Offered: Does the yard offer additional services like part removal, installation assistance, or even delivery? These can be valuable perks.
Tools and Techniques for Your Search:
- Online Directories: Utilize online directories dedicated to locating salvage yards in your area.
- Search Engines: Leverage search engines like Google, using relevant keywords like “sportbike salvage yard near me” or “used sportbike parts + [your city/state]”.
- Local Forums and Communities: Engage with online communities or forums frequented by sportbike riders in your area. They often share recommendations and insights about local salvage yards.
- Word-of-Mouth: Don’t underestimate the power of personal recommendations. Ask fellow riders, mechanics, or motorcycle shops for their suggestions.
Visiting the Salvage Yard: Tips for Success
Once you’ve identified a promising sportbike salvage yard, here are some tips for a successful visit:
- Call Ahead: Contact the yard beforehand to confirm their operating hours, inquire about specific parts availability, and ask if they have a pull-your-own policy (where you remove the parts yourself) or if they offer removal assistance.
- Gather Information: Prepare a list of the parts you need, including model-specific details, and take pictures of your bike for reference if needed.
- Dress for the Occasion: Wear sturdy shoes and closed-toe footwear, as salvage yards can be dusty and have uneven surfaces.
- Bring Tools (optional): If the yard allows pull-your-own options, bring basic tools like wrenches and screwdrivers to remove the parts you need.
- Negotiate: While not always applicable, some salvage yards are open to negotiation, especially for larger purchases. Be polite and respectful when making an offer.
- Inspect the Parts Thoroughly: Before purchasing any part, meticulously inspect it for any damage, wear and tear, or missing components. Ensure it aligns with your needs and expectations.
Beyond the Parts: Additional Resources and Considerations
Finding the perfect sportbike salvage yard is just the first step. Remember these additional points:
- Safety First: Always prioritize safety when navigating a salvage yard. Wear protective gear and be cautious around machinery and potential hazards.
- Ask Questions: Don’t hesitate to ask the yard staff for assistance or clarification regarding parts, compatibility, or their return policy.
- Warranty Options: Explore whether the yard offers any warranties on the parts you purchase, providing peace of mind in case of unforeseen issues.
6 FAQs: Finding the Perfect Parts at a Sportbike Salvage Yard
-
Do I need to be a mechanic to navigate a sportbike salvage yard?
- While familiarity with motorcycles is helpful, it’s not mandatory. Many salvage yards have staff available to assist and answer questions.
-
What happens if the part I buy is damaged?
- Most salvage yards have a return policy, but always inquire about specific details and timelines before purchasing.
-
Can I negotiate prices at a sportbike salvage yard?
- While not always possible, some yards are open to negotiation, especially for larger purchases. Be polite and respectful when making an offer.
-
What safety precautions should I take when visiting a sportbike salvage yard?
- Wear closed-toe shoes, be mindful of uneven surfaces, and avoid touching any machinery or electrical equipment.
-
How can I ensure the compatibility of a used part with my specific motorcycle model?
- Consult your owner’s manual, research online forums, or seek assistance from the salvage yard staff to confirm compatibility.
-
What are some alternative options if I can’t find the part I need at a salvage yard?
- Online marketplaces and dealerships specializing in used motorcycle parts can be explored as alternative options.
By following these tips and utilizing the resources available, you can confidently navigate the world of sportbike salvage yards and find the perfect parts to breathe new life into your beloved machine, all while saving money and potentially reducing your environmental footprint. Remember, a little research and preparation can go a long way in ensuring a successful and rewarding experience.
No products found.