If you have always wanted to record turn-by-turn commentary on your rides and you use a GoPro Hero 3 or 4 to record, the Sena GP10 Bluetooth pack is a must-have accessory. The “BacPac” allows you to record narration in real time using Sena’s “Ultra HD Voice Recording” mode or the “Normal” mode. You can even combine voices from other intercom users so the entire conversation can be used as an overlay voice-over. Download the Sena GP10 User Guide Here
What is the Sena GP10 Bluetooth Pack for GoPro?
Using Bluetooth headsets, the Sena GP10 Bluetooth Pack allows you to narrate the video while you are recording, reducing the need for audio editing and creating real-time audio experiences as part of your video. It is only compatible with the GoPro Hero 3, 3+ and 4 cameras. The microphone can capture voice and sound up to 110 yards and has a talk time of up to three hours.
Using the Sena GP10 GoPro Backpack
Connecting the GP10 is simple, attaching like any other GoPro accessory. Gently push the connector into the bus slot and hook the end over the camera to connect. Keep in mind that the USB jumper must be connected between the GP10 and the camera and, because the pack sticks out from the side of the camera a bit, it cannot be used with the waterproof housing that comes standard with the GoPro, but Sena makes an optional waterproof housing that will accommodate the jumper. Once the GP10 is connected, pair the GoPro by pressing and holding the pairing button until the status announcement lets you know it is connected. The instructions that come with the GP10 can be confusing, however. There are two switches on the back of the GP10, one to power the GP10 and another to turn the microphone on the GoPro itself.
Sena GP10 GoPro Backpack in Action
It is highly recommended that you don’t use the solo GP10 when recording ambient sound from the GoPro’s microphone as the wind noise quickly overwhelms the voice. Sena reports that an update will correct this problem in the future. There does not seem to be much difference between the “Normal” mode and the “Ultra HD Voice Recording Quality” mode.
Overall, the Sena GP10 GoPro Backpack works well and is an excellent accessory for those who wish to record narrative on their video in real-time. Even with the GP10, you will still want to add a video editing application if you are serious about recording action video as the GP10 does not eliminate the need for video editing. One area where the GP10 could be very beneficial is the creation of instructional videos where narrating what you are doing is very helpful for a beginner. To learn more about the Sena GP10 GoPro Packpack and other adventure accessories, visit my YouTube channel today.
You Might also like
-
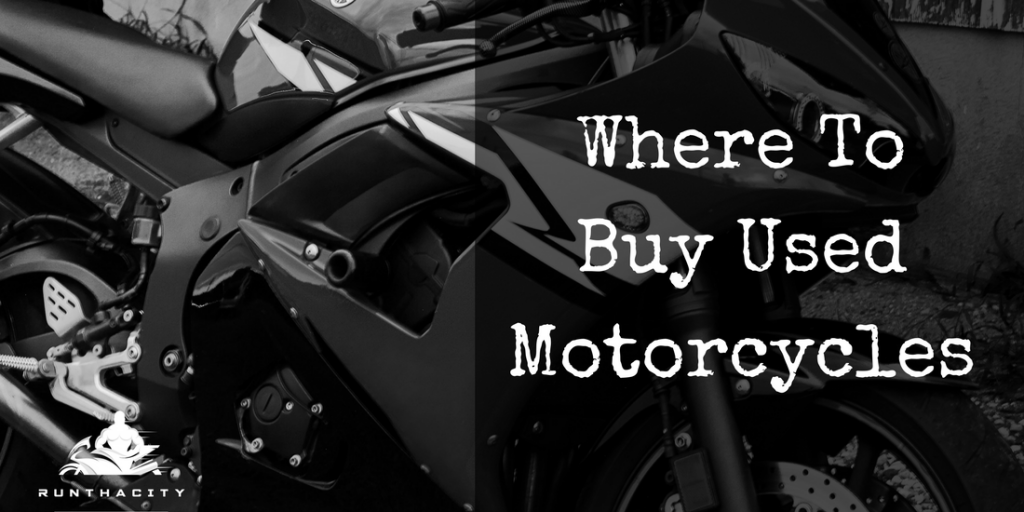
Where To Buy Used Motorcycles
If you have made the decision to buy a motorcycle, you have probably set your budget and decided what bike is best for your needs. For many people, the cost of a brand-new motorcycle is out of their price range so they decide to go with a used bike. However, you want to be sure you purchase a bike that is in good condition, mechanically sound and will last you a long time.
With so many options available to find used bikes, it can be difficult to decide the best place to go to purchase yours. These are some of the best places to find used motorcycles and some tips on what to watch for when you use these services. If you’re wondering how to buy a motorcycle, here is another great article.
Where Can I Buy Used Motorcycles Online?
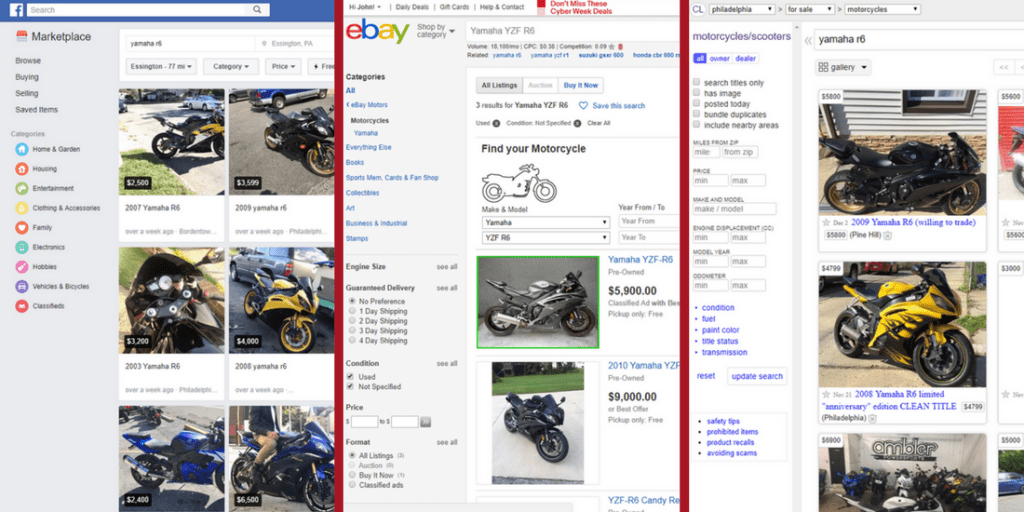
Get Cheap Used Motorcycles On Craigslist
You can find almost any type of bike available on Craigslist but there are some precautions you should take. Many people who sell on Craigslist are unaware of the true value of what they are selling, so it is possible to get good bargains there.
However, there are also many people who believe the old bike they refurbished is worth much more than it actually is, so it is important to do your homework before you answer an ad. Also remember that Craigslist is a true “buyer beware” option. If the motorcycle fails mechanically in a few months, you have no recourse against the seller.
Buy Cheap Used Motorcycles On Ebay
If you are searching for a hard-to-find bike, Ebay may be your best option. The biggest benefit to Ebay is that you don’t have to talk to the seller until you are ready to buy. Questions can be answered through the Ebay message system. Even when you are ready to buy, you don’t need to talk to the seller. Simply purchase the bike, pay online and it will arrive at your door.
This means you never get to test drive the bike nor do you get to have it checked out mechanically before you purchase. Although Ebay does have buyer protections, it can be a difficult process to manage. The bikes on Ebay are historically more expensive and there could be shipping costs involved which could drive the cost up significantly.
Find “Motorcycles For Sale Near Me” In The Classifieds
Fewer people check classified advertisements as newspapers slowly fade into the background and are replaced with online news sources. One of the benefits to checking the classifieds is that anyone who places an ad for a bike is motivated to sell.
Classifieds require the seller to pay an up-front fee to place the ad, unlike Ebay, where you only pay if the bike sells, or Craigslist, where you don’t pay at all. There are often small, local companies that publish nothing but classifieds in flyers and booklets where you may find bargains on used bikes.
Buy Used Motorcycles From Local Dealers
Dealerships take trade-in bikes all the time, so they often have a large inventory of motorcycles available. Many dealers also offer limited warranties on used bikes so if there is a problem, you may not be left with the bill to repair it. Dealers also have a reputation to uphold, and although there are some bad dealerships, the majority work to make sure you are satisfied with your purchase.
Dealers can also help guide newer riders to bikes that are suited for them. Although dealership bikes may be more expensive due to the overhead the company must pay, having a dealer back the used bike is worth the added cost in the long run.
Cheap Motorcycles For Sale On Facebook Marketplace
Facebook Marketplace has become really popular for buying and selling motorcycles and motorcycle parts. You can discover bikes for sale near you. Easy to use on your phone or your desktop, and most people already have a Facebook account. In fact that is how I found my 2004 Yamaha YZF-R6 (Second Generation). With Facebook Marketplace you can search by brand, model, year, price, and distance from your location. Once you find a bike you’re interested in simply message the seller.
Bonus Buyer’s Tip: Depending on the sellers Facebook settings, you may be able to see a few extra pics of the motorcycle and its condition by checking out the sellers profile. Most motorcycle lovers are proud of our rides and will have multiple pics posted. Simply click on the sellers profile and view images.
Take a look at a few other places you can buy used sportbikes online:
The Best Apps to Buy Used Motorcycles
One option for selling your bike online, designed specifically for buying or selling motorcycles, is RumbleOn. The site is available as a mobile app that allows you to put in all the info about your bike, take photos and upload to the site. RumbleOn sends you a Cash Offer Voucher that is good for three days. If you agree, they come get the bike and handle all the paperwork.
CycleTrader is another app that allows you to sell motorcycles and also includes reviews cars available online.
These apps are available in the Apple or Google Play Store:
Google Play Store Apps
On Apple Itunes Apps
These are just a few places where you can find used motorcycles for sale. Word-of-mouth is another way to find bikes for sale. A friend may know a friend who wants to get rid of their bike or a co-worker may be looking at upgrading. If you want to learn more tips on buying used bikes, subscribe to my YouTube channel today.
-
The Best Stretching Exercises for Sportbike Riders
Riding a sportbike can be an exhilarating experience, offering a sense of freedom and excitement. However, it can also be demanding on the body, particularly on the muscles and joints used most during rides. To ensure both safety and enjoyment while riding, incorporating stretching exercises into your routine is essential. Below, we outline the best stretching exercises specifically designed for sportbike riders, aiming to enhance flexibility, reduce muscle stiffness, and prevent injury.
Key Takeaways
- Stretching improves flexibility and range of motion, essential for comfortable and safe riding.
- Regular stretching can prevent muscle stiffness and soreness, particularly in areas heavily used during rides such as the wrists, shoulders, and legs.
- Incorporating exercise stretch bands can enhance stretching routines, offering resistance that can help improve overall flexibility.
Comparison Table: Stretching vs. No Stretching for Sportbike Riders
Criteria With Stretching Without Stretching Flexibility Improved Decreased Muscle Soreness Reduced Increased Injury Risk Lowered Elevated Riding Comfort Enhanced Compromised Recovery Time Shortened Lengthened Why Stretching is Crucial for Motorcycle Riders
Before delving into the specific exercises, it’s important to understand why stretching is so beneficial for motorcycle riders. Stretching can improve range of motion, decrease the risk of muscle soreness and injuries, and enhance your overall riding experience by keeping the body flexible and prepared for the demands of riding.
Best Stretches for Motorcycle Riding
- Wrist Extensor and Flexor Stretches
- Purpose: Alleviates wrist stiffness and prevents arm pump.
- How to Do: Extend your arm, palm down, and gently pull the fingers towards your body with the other hand. For the flexor stretch, extend your arm, palm up, and pull the fingers towards your body.
- Shoulder and Chest Openers
- Purpose: Opens the chest and shoulders, counteracting the forward-leaning posture.
- How to Do: Interlace your fingers behind your back, straighten your arms, and lift your chest upwards, feeling the stretch in your shoulders and chest.
- Hip Flexor Lunges
- Purpose: Loosens the hip flexors, crucial for maintaining a comfortable riding position.
- How to Do: Step forward into a lunge, keeping the back leg straight and the front leg at a 90-degree angle. Push your hips forward.
- Quadriceps Stretch
- Purpose: Stretches the front thigh muscles, which can become tight from the riding position.
- How to Do: Standing on one leg, pull the other foot towards your buttock, keeping the knees together.
- Seated Hamstring Stretch
- Purpose: Increases flexibility in the back of the legs.
- How to Do: Sit on the ground, extend your legs, and reach towards your toes.
- Glute and Piriformis Stretch
- Purpose: Relieves tightness in the buttocks and lower back.
- How to Do: Sitting on the floor, cross one leg over the other and gently pull the knee towards the opposite shoulder.
Incorporating Stretch Bands for Enhanced Flexibility
Exercise stretch bands can be a valuable tool for motorcycle riders looking to enhance their stretching routine. They provide resistance, increase the effectiveness of stretches, and help improve overall flexibility. Here are a couple of stretches using exercise bands:
- Band-Assisted Hamstring Stretch: Lie on your back, loop a band around your foot, and gently pull back, keeping the leg straight.
- Shoulder Stretch with Band: Hold a stretch band in both hands, lift your arms over your head and behind your back, stretching the shoulders.
FAQs on Stretching for Motorcycle Riding
- How often should I stretch?
- Ideally, before and after each ride to warm up and cool down the muscles.
- Can stretching improve my riding performance?
- Yes, by enhancing flexibility and reducing muscle fatigue.
- Are there stretches to prevent lower back pain from riding?
- Yes, hip flexor stretches and lower back stretches can help alleviate and prevent lower back pain.
- Why is stretching important for motorcycle riders? S
- tretching improves flexibility and reduces the risk of muscle stiffness and injuries, making riding more comfortable and enjoyable.
- How often should I stretch for the best results?
- Ideally, before and after each ride to prepare your muscles for the ride and to aid in recovery afterwards.
- Can stretching help with lower back pain from riding?
- Yes, specific stretches targeting the lower back and hip flexors can alleviate and prevent lower back pain.
- Are exercise stretch bands beneficial for riders?
- Yes, they add resistance to stretches, effectively improving flexibility and strength in key muscle groups.
- What are the best stretches for sportbike riders?
- Wrist, shoulder, hip flexor, quadriceps, hamstring, and glute stretches are highly beneficial.
- How long should each stretch be held?
- Each stretch should be held for at least 30 seconds to maximize its effectiveness.
Conclusion
Incorporating these stretching exercises into your routine can significantly enhance your motorcycle riding experience. Not only do they prepare your body for the ride, but they also help prevent post-ride stiffness and soreness. Remember, consistency is key to seeing improvements in flexibility and to enjoy a more comfortable and enjoyable ride.
For more tips on fitness and motorcycle riding, check out our Fitness Blog at RunTheCity. Whether you’re a seasoned rider or just starting, understanding and practicing these stretches can lead to a healthier, more enjoyable riding experience.
-
Gear Up for the Ride: Top Bluetooth Motorcycle Helmets in 2024
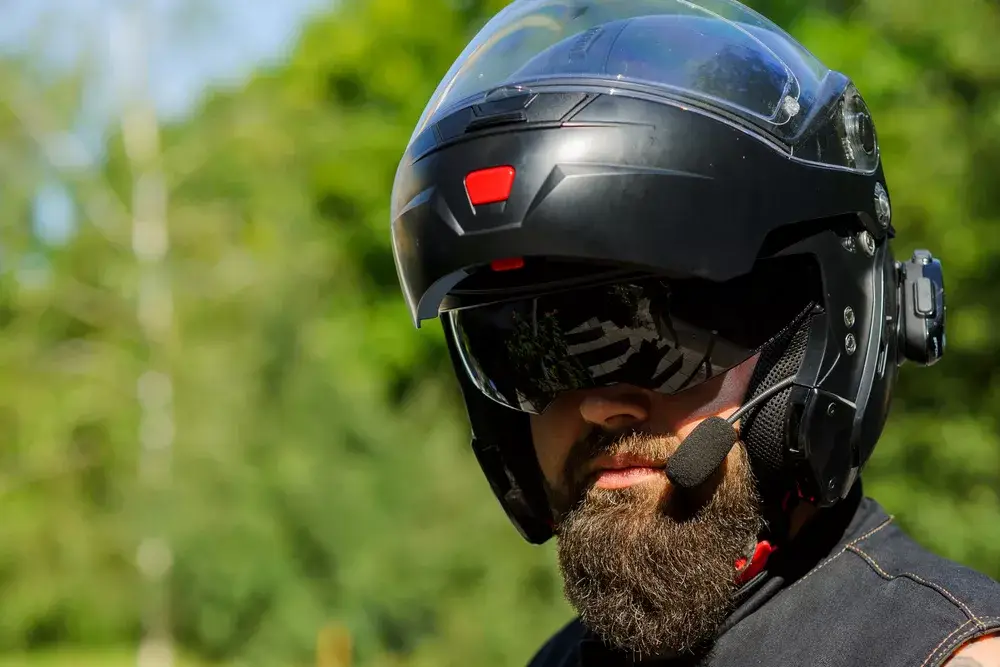
In the ever-evolving world of motorcycle gear, Bluetooth technology has become an increasingly desired feature for helmets. Gone are the days of fumbling with earpieces or missing calls while riding. Today’s Bluetooth motorcycle helmets seamlessly integrate communication, entertainment, and safety features, enhancing your riding experience in numerous ways.
Key Takeaways:
- Safety First: DOT and ECE certifications are crucial, and professional installation is recommended for adding Bluetooth to non-equipped helmets.
- Feature Balance: Consider factors like noise cancellation, communication range, and desired functionalities to match your riding style.
- Expert Guidance: Consult motorcycle gear experts for personalized recommendations based on your needs and budget.
Comparison Table: Top Bluetooth Motorcycle Helmets (Note: Prices are subject to change)
Feature
Sena Impulse
Sena Stryker
ScorpionEXO AT960
ILM 902BT/902BT PRO
ILM 159BT
Type Modular Full-Face Modular Modular Modular Price $599-$699 $599-$699 $449 $199 $179 Communication Mesh intercom (2.4 miles) Bluetooth 5.1 Intercom (1 mile) Intercom (1000 ft) Intercom (1000 ft) Noise Cancellation Excellent Superior Good N/A N/A Special Features Harman Kardon speakers, MP3 player Voice control Integrated alarm system FM radio, MP3 player Group intercom (up to 3 riders) Disclaimer: This table is for informational purposes only and does not constitute a comprehensive comparison. Prices listed are approximate and may vary depending on retailer.Benefits of Bluetooth Motorcycle Helmets:
- Enhanced Safety: Staying connected hands-free allows you to answer calls, receive navigation instructions, or communicate with fellow riders without compromising your focus on the road.
- Convenience: Listen to music, enjoy podcasts, or utilize voice commands for added ease while riding.
- Improved Group Communication: For group rides, Bluetooth intercom systems enable clear communication between riders, enhancing the overall riding experience.
Choosing the Right Helmet:
Selecting a Bluetooth motorcycle helmet requires careful consideration beyond just the presence of Bluetooth connectivity. Here are some key factors to prioritize:
- Safety Certifications: Ensure the helmet meets the safety standards set by reputable organizations like the Department of Transportation (DOT) or the Economic Commission for Europe (ECE).
- Comfort: A well-fitting helmet is crucial for long rides. Look for helmets with adjustable features and comfortable padding.
- Noise Cancellation: Effective noise cancellation reduces wind noise and engine roar, allowing for clearer communication and a more enjoyable ride.
- Battery Life: Consider how long the battery lasts on a single charge, especially for longer journeys.
- Communication Features: Explore the type of Bluetooth system offered (universal pairing, intercom capabilities, range).
- Additional Features: Some helmets may include extras like voice control, built-in sun visors, or mobile device connectivity.
Review Methodology:
The following reviews are based on a comprehensive analysis of information gathered from:
- Manufacturer specifications and listed features.
- Expert reviews published by reputable motorcycle gear websites and publications.
- User feedback and ratings on trusted e-commerce platforms and motorcycle forums.
Disclaimer: Due to the safety implications and the complexities involved in thoroughly testing multiple helmets, personal insights from testing are not included in this review section.Top Helmet Picks:
Specifications:
- DOT-approved
- Flip-up modular design
- Integrated mesh intercom system (up to 2.4 miles range)
- Harman Kardon speakers and microphone
- MP3 player, voice dial capability
- Weight: 4.2 lbs (1.9 kg)
No products found.
- Expert Reviews: Praised for its comfortable modular design, excellent audio quality by Harman Kardon, and long-range mesh intercom system. Some reviewers noted the battery life could be improved for extended rides.
- User Reviews: Users appreciate the modular design, clear communication, and ease of use. A few users mentioned wind noise concerns at higher speeds.
- Specifications:
- DOT-approved
- Full-face helmet design
- Bluetooth 5.1 connectivity
- Advanced noise cancellation
- Integrated speakers and microphone
- Voice control functionality
- Weight: 4.5 lbs (2.0 kg)
No products found.
- Expert Reviews: Experts commend the Stryker’s superior noise cancellation, voice control features, and sleek design. A few reviewers found the price point to be on the higher end.
- User Reviews: Riders acknowledge the exceptional noise cancellation, voice command functionality, and comfortable fit. Some users commented on the bulkier feel compared to other options.
3. ScorpionEXO AT960 Modular Adventure Street Helmet:
- Specifications:
- DOT and ECE certified
- Modular adventure helmet design
- Integrated EXO-COM Bluetooth communication system (up to 1 mile range)
- Aerodynamic shell design for reduced wind noise
- Sun visor, multiple vents for improved airflow
- Weight: 5.2 lbs (2.3 kg)
No products found.
- Expert Reviews: Appreciated for its versatility as an adventure helmet, integrated communication system, and aerodynamic design. Some reviewers mentioned the weight could be a concern for long rides.
- User Reviews: Riders favor the helmet’s functionality for adventure riding, built-in communication system, and comfortable fit. A few users noted occasional connectivity issues with the Bluetooth system.
4. ILM Bluetooth Motorcycle Helmet (Model 902BT/902BT PRO):
- Specifications:
- DOT-approved
- Modular flip-up design
- Bluetooth intercom system (up to 1000 feet range)
- FM radio, MP3 player
- Dual visor system
- Weight: 4.0 lbs (1.8 kg)
No products found.
- Expert Reviews: Limited information available from established reviewers. However, some sources acknowledge its affordability, built-in radio and MP3 player features.
- User Reviews: Users find the helmet to be a budget-friendly option with basic communication features. Some reviews mention concerns regarding durability and noise isolation.
5. ILM Bluetooth Motorcycle Helmet (Model 159BT):
- Specifications:
- DOT-approved
- Modular flip-up design
- Bluetooth intercom system for up to 3 riders (up to 1000 feet range)
- FM radio
- Dual visor system
- Weight: 4.1 lbs (1.8 kg)
No products found.
- Expert Reviews: Similar to the previous ILM model, extensive reviews from established sources are limited. However, affordability and multi-rider intercom system are mentioned as potential positives.
- User Reviews: Riders acknowledge the advantage of group communication for the price point. Similar to the previous ILM model, concerns regarding durability and noise isolation are mentioned in some user reviews.
Comparative Analysis:
- Overall Communication: Sena Impulse and Sena Stryker offer superior range and intercom features compared to the other options.
- Noise Cancellation: Sena Stryker excels in this area, followed by the ScorpionEXO AT960.
- Weight: ILM models are lighter options, while the ScorpionEXO AT960 is heavier due to its adventure-oriented design.
- Additional Features: Sena Stryker boasts voice control, while ILM models include FM radio and MP3 player.
Remember: This review section provides a general overview based on available information and should not be the sole factor in selecting your helmet.
It is crucial to prioritize safety certifications (DOT, ECE) and consult with motorcycle gear experts to find the helmet that best suits your riding style, needs, and budget.
Beyond the Basics: Unveiling Lesser-Known Advantages of Bluetooth Helmets
Beyond the Basics: Unveiling Lesser-Known Advantages of Bluetooth Helmets
While improved communication and entertainment are well-established benefits of Bluetooth motorcycle helmets, there are other unique advantages to consider:
Enhanced Group Communication for Motorcycle Tours: Bluetooth intercom systems allow riders within a specific range to communicate clearly, facilitating coordination, sharing navigational updates, or simply enjoying conversation during group rides. This can significantly enhance the overall touring experience.
Real-Time Security Updates through Motorcycle Alarm Integration: Certain Bluetooth helmets can connect with compatible motorcycle alarms, enabling riders to receive notifications on their helmet’s display in case of potential security breaches or attempted tampering with their motorcycle. This provides real-time awareness and allows for a quicker response.
Fitness Tracking Integration for Monitoring Vitals: A growing number of Bluetooth helmets offer the ability to pair with fitness trackers. This allows riders to monitor their heart rate, blood pressure, and other vitals during the ride. This data can be valuable for maintaining physical awareness and making informed decisions during long journeys.
Addressing Common Concerns: Battery Life and Safety
Battery Life:
Maximizing Battery Life:
- Reducing Bluetooth connections to essential devices.
- Turning off features like FM radio or music streaming when not in use.
- Adjusting the speaker volume to a moderate level.
Extending Battery Life for Long Rides:
- Carrying a portable power bank for on-the-go charging.
- Investing in a helmet with a replaceable battery.
- Opting for helmets with efficient power management features.
Impact on Safety:
- Potential Distractions: While Bluetooth helmets offer undeniable benefits, it’s crucial to prioritize safe riding practices.
- Minimize distractions: Avoid excessive communication or engaging with features that take your attention away from the road.
- Focus on the Road: Remain alert and prioritize situational awareness while riding.
Remember:
- Bluetooth features should complement your ride, not replace safe riding habits.
- Always prioritize maintaining full focus on the road and potential hazards.
Disclaimer:
- The information provided regarding fitness tracker integration and motorcycle alarm connectivity is based on the evolving capabilities of certain Bluetooth helmet models. Not all helmets possess these features.
It’s vital to consult with motorcycle gear experts and prioritize safety certifications (DOT, ECE) when selecting a helmet.
Installation Considerations: Safety First!
While the previous sections explored various Bluetooth motorcycle helmets, it’s crucial to address the critical aspect of installation.
Safety Disclaimer:
Equipping a non-Bluetooth helmet with an aftermarket communication system can compromise the helmet’s integrity and potentially affect its safety certifications. Therefore, I strongly recommend seeking professional installation from a certified technician to ensure proper integration and maintain the helmet’s protective capabilities.
Personal Experience:
In my own riding experience, I’ve experimented with adding a budget-friendly ($100) Bluetooth system to a helmet. While it offered basic functionality, the sound quality was poor, communication range was limited, and the overall experience fell short of expectations. Upgrading to a more reputable brand (around $300) resulted in a significant improvement. The audio quality was crisp, the intercom range increased noticeably, and the overall user experience was much smoother.
This personal example highlights the importance of considering quality and potential safety implications when dealing with aftermarket helmet modifications.
General Information (for informational purposes only):
It’s important to understand that adding Bluetooth to a non-equipped helmet involves:
- Disassembling the helmet liner: This may require specialized tools and knowledge to avoid damaging the helmet’s components.
- Mounting the speakers and microphone: Proper placement is crucial for optimal audio quality and comfort.
- Connecting the wiring: Incorrect wiring can lead to malfunctions or even electrical hazards.
Remember:
- Due to the potential risks involved, this section is solely for informational purposes and should not be interpreted as a guide for self-installation.
- Always prioritize safety and consult with a certified professional for any modifications to your motorcycle helmet.
6 FAQs: Choosing the Right Bluetooth Motorcycle Helmet
Are Bluetooth motorcycle helmets safe?
Bluetooth functionality itself does not compromise safety. However, ensuring proper installation, especially for aftermarket systems, is crucial to maintain the helmet's integrity and safety certifications.
2. How long does a Bluetooth motorcycle helmet battery last?
Battery life varies depending on usage and features. 3-6 hours of talk time is a common range, with some helmets offering extended life or replaceable batteries.3. Can I install a Bluetooth system myself in a non-equipped helmet?
While possible, it's strongly recommended to seek professional installation to avoid compromising the helmet's safety and adhere to manufacturer recommendations.
4. What are the benefits of Bluetooth motorcycle helmets besides communication?
Bluetooth helmets offer features like music streaming, GPS navigation assistance, and even fitness tracker integration (on some models).
5. How much does a good Bluetooth motorcycle helmet cost?
Prices vary depending on features, brand reputation, and quality. Generally, expect to spend $300 or more for a helmet with reliable communication and noise cancellation capabilities.
6. What are the most important factors to consider when choosing a Bluetooth motorcycle helmet?
Safety certifications (DOT, ECE) are paramount. Other crucial factors include comfort, noise cancellation, desired communication features, and battery life.
Conclusion: Finding the Perfect Fit – Safety, Functionality, and You
The world of Bluetooth motorcycle helmets offers a plethora of features and functionalities to enhance your ride. From crystal-clear communication to convenient music streaming, these helmets have revolutionized the riding experience.
This article explored various helmet options, highlighting factors like safety certifications, comfort, noise cancellation, and unique features like group communication and fitness tracker integration.
Remember, the key takeaway is to prioritize safety first.
- DOT and ECE certifications are essential for ensuring your helmet meets rigorous safety standards.
- Professional installation is crucial when adding Bluetooth systems to non-equipped helmets to maintain the helmet’s integrity and safety certifications.
Finding the right helmet involves striking a balance between:
- Safety: Always prioritize helmets with the necessary certifications.
- Functionality: Consider the features that best suit your riding style and needs.
- Personal Preferences: Comfort, weight, and noise cancellation are essential factors for a pleasurable riding experience.
Beyond the information provided here, conducting further research and consulting with motorcycle gear experts is vital. Their experience can guide you towards a helmet that aligns perfectly with your safety requirements, riding style, and budget.
Never compromise safety for convenience. Choose a Bluetooth motorcycle helmet that empowers you to ride confidently and enjoy the journey, while always prioritizing your well-being on the road.


