Uncategorized

Muscle Fiber Saturation: The Hidden Benefits of 200-Rep Dumbbell Press Workouts

Think you need to push heavy weights to build strength and muscle? The secret to growth may lie in something surprising: reaching 200 reps.

High-rep training, specifically a 200-rep dumbbell press workout, can provide benefits beyond conventional strength training. Through a concept known as muscle fiber saturation, high-rep workouts can exhaust every muscle fiber, leading to enhanced muscle endurance, definition, and overall conditioning. In this post, we’ll dive into the science behind muscle fiber saturation, the benefits of high-rep training, and how to safely incorporate a 200-rep dumbbell press workout into your routine.

Table: Sample 200-Rep Dumbbell Press Workout Breakdown

Rep Scheme Sets Reps per Set Rest Time Suggested Weight
Option 1 4 sets 50 reps 45–60 seconds 25–30% of one-rep max
Option 2 5 sets 40 reps 30–45 seconds 25–30% of one-rep max
Option 3 10 sets 20 reps 30 seconds 25–30% of one-rep max

Note: Start with a weight that allows you to complete each set with proper form while reaching fatigue by the last few reps. Adjust reps, sets, and rest periods based on your current fitness level and endurance.

Understanding Muscle Fiber Saturation

What is Muscle Fiber Saturation?

Muscle fiber saturation is the process of fully engaging and fatiguing every muscle fiber in a target muscle group. In a 200-rep dumbbell press, for example, the high number of reps progressively recruits both slow-twitch (endurance) and fast-twitch (strength) muscle fibers, achieving complete muscle fatigue.

  • Key Point: This progressive activation leads to a thorough breakdown of muscle tissue, triggering growth and adaptation as the body repairs and strengthens the fibers.
  • Research Insight: Studies show that high-rep training can boost capillary density and mitochondrial growth, enhancing muscle endurance, metabolic capacity, and recovery.

How High-Reps Benefit Muscle Growth

High-rep training doesn’t just build endurance—it can actually support muscle growth by maximizing blood flow, nutrient delivery, and metabolic stress. With 200 reps, you’re keeping the muscles under tension for an extended period, which is one of the key factors in hypertrophy (muscle growth).

  • Key Point: Metabolic stress and time under tension are powerful stimuli for muscle growth, making high-rep sets an effective tool for building size and endurance.
  • Example: While a traditional 8–12 rep strength workout mainly targets fast-twitch fibers, a 200-rep workout recruits all fibers and creates a sustained burn that enhances muscle endurance and hypertrophy.
The Benefits of 200-Rep Dumbbell Press Workouts

The Benefits of 200-Rep Dumbbell Press Workouts

The Benefits of 200-Rep Dumbbell Press Workouts

Increased Muscle Endurance and Stamina

With a 200-rep set, your muscles adapt to become more resistant to fatigue. This endurance carries over into other high-intensity activities, allowing you to lift for longer durations and maintain strength over multiple sets.

  • Key Point: Over time, increased muscle stamina will help you perform more reps with heavier weights, enhancing your overall strength capacity.
  • Benefit Summary: Building endurance through high reps isn’t only valuable in the gym—it improves performance in sports, daily activities, and any scenario where muscular stamina is essential.

Enhanced Muscle Definition and Conditioning

High-rep training can create a “saturation” effect in the muscles, leading to improved muscle definition and conditioning. When you complete 200 reps, the continuous movement pumps blood into the muscle, creating a fuller appearance and increasing vascularity.

  • Key Point: The “pump” effect from high reps enhances muscle tone and conditioning, making muscles appear more defined and chiseled.
  • Example: Bodybuilders often use high-rep sets to increase muscle visibility and vascularity before competitions, giving their muscles a hard, full look.

Improved Recovery and Capillary Density

Performing high reps helps improve recovery by boosting blood flow and capillary density in the muscles. Increased capillaries mean more efficient delivery of oxygen and nutrients, which aids in muscle repair and growth.

  • Key Point: High-rep training encourages capillary growth around muscle fibers, supporting faster recovery and reducing post-workout soreness.
  • Research Insight: Studies suggest that high-rep training improves mitochondrial density and oxidative capacity, helping muscles recover faster and become more resilient.

How to Structure a 200-Rep Dumbbell Press Workout

Choosing the Right Weight

Selecting the right weight is crucial for a high-rep workout. Using a manageable weight allows you to maintain form throughout all 200 reps. Ideally, aim for a weight that’s around 30-40% of your one-rep max for dumbbell presses.

  • Key Point: A moderate weight ensures that you can complete all reps with good form while reaching muscle fatigue by the end.
  • Example: If your max press is 80 lbs, start with 25–30 lb dumbbells, focusing on steady, controlled movements.

Suggested Rep Scheme

Breaking down 200 reps can make the workout more approachable and sustainable. Here are a few ways to structure your reps depending on your fitness level and endurance:

  • 4 sets of 50 reps
  • 5 sets of 40 reps
  • 10 sets of 20 reps

Tip: Beginners can start with 10 sets of 20 reps, gradually increasing reps per set as their endurance builds.

Managing Rest Periods

For optimal muscle fiber saturation, aim for short rest periods of 30–45 seconds between sets. Keeping rest times short helps maintain blood flow and prevents the muscles from fully recovering, ensuring they stay under tension.

  • Key Point: Short rest periods create metabolic stress, which is essential for muscle conditioning and growth in high-rep training.
  • Tip: Use a timer to keep your rest periods consistent and avoid losing focus between sets.

Ensuring Proper Form and Control

When performing high-rep workouts, maintaining good form is essential to prevent injuries. The high volume of reps increases the likelihood of fatigue, so prioritize slow, controlled movements for each rep.

  • Tip: Halfway through each set, check your form to ensure you’re keeping a steady pace and maintaining a full range of motion.

Tips for Safely Incorporating 200-Rep Workouts

Start Slowly and Gradually Increase Volume

To prevent overtraining, begin with a lower rep count (such as 100 reps) and work your way up to 200 over a few sessions. This gradual increase helps your muscles adapt to the higher volume without causing strain.

  • Example: Start with 100 reps split into 5 sets of 20, and add 10–20 reps each week until you reach 200.

Include Rest Days and Active Recovery

High-rep training places significant demands on your muscles, so it’s essential to schedule rest days to allow for recovery. Consider adding active recovery techniques like stretching, foam rolling, or light cardio.

  • Quick Tip: Active recovery helps reduce muscle soreness and improves circulation, speeding up recovery between workouts.

Incorporate Nutritional Support for Endurance Training

Fueling high-rep training requires a diet high in protein and carbohydrates to support muscle repair and energy. Stay hydrated and consider supplementing with electrolytes to prevent fatigue.

  • Example: Aim for 1.2–1.5 grams of protein per kilogram of body weight and drink plenty of water before and after your workout for optimal hydration.

Table: Alternative 200-Rep Dumbbell Press Workout Breakdown: Increasing Sets and Weight

Rep Scheme Sets Reps per Set Rest Time Suggested Weight
Option 1 20 sets 10 reps 45–60 seconds 40–50% of one-rep max
Option 2 25 sets 8 reps 30–45 seconds 50–60% of one-rep max
Option 3 40 sets 5 reps 30 seconds 60–70% of one-rep max

Note: Choose a weight that allows you to maintain good form for each set, with enough resistance to reach muscle fatigue by the last few reps in each set. Adjust reps, sets, and weights as you build endurance and strength over time.

Conclusion

200-rep dumbbell press workouts offer unique benefits that go beyond traditional strength training. By saturating muscle fibers, you’ll increase muscle endurance, boost definition, and improve recovery. Whether you’re looking to condition your muscles or enhance stamina, the 200-rep workout is an effective strategy that challenges both your strength and endurance.

Take Action

  • Try It: Add a 200-rep workout to your weekly routine to see the effects of muscle fiber saturation.

Beginner’s Guide To Shifting Gears On A Motorcycle

An underrated aspect of learning how to ride a motorcycle goes beyond turning and popping wheelies. No, it’s something seemingly much more simple than that. Do you shift? Sure, shifting gears should be easy, because it’s a basic function; but shifting gear does have a layer of complexity that beginning cyclists could have problems mastering right away. 

Here’s everything you need to know about shifting gears on a motorcycle. 

Motorcycle Gears Basics

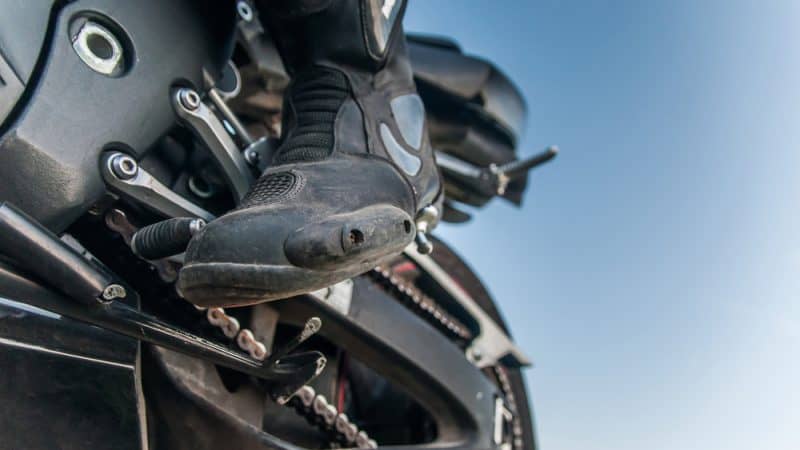
The three basic controls are ones that you might already know—the throttle, the clutch, and the gear selector. You use the throttle to rev the engine, the clutch to engage and disengage the brakes (transmission), and to select gears. For instance, if you pull the left hand clutch towards you, the engine revs without ever moving the bike. 

The gear pattern can be clicked through by using the gear selector lever and is moved by your left foot. Most bikes have the following gears, starting with the lowest first: 

• First gear
• Neutral
• Second gear
• Third gear
• Fourth gear
• Fifth gear 
• Sixth gear (depending on the bike)

As you can see, shifting fears is sequential. Up or down, neutral (N) is always put between 1st and 2nd gear. 

Technique For Motorcycle Shifting

It’s best to learn the proper technique required to maneuver through shifting gears before learning how to do anything else. 

Steps of the proper shifting technique:

  1. Disengage the clutch. Use your left hand to pull it towards you. 
  2. Select the correct gear by using your left food on the shifting lever.
  3. Slightly rev the engine if shifting up.
  4. Gradually release the clutch. Don’t pop it.
  5. Feather the throttle while releasing the clutch to accelerate smoothly.
  6. Continue revving if you which to switch to another gear in succession. Otherwise, find a nice cruising speed to maintain. 

Shifting With Sound and Feel

Have you ever heard wailing motorcycle engines on the road? You’ve probably thought to yourself, “Is that rider even shifting?” That’s you using the basic rule of sound. In basic terms, if an engine starts to scream, you shift to an upper gear. If the engine starts to grumble, then shift the engine lower. 

There a many methods to help you do this properly. Beginners should only focus on the simplest method. Afterwards, you can experiment. 

Start off by riding in first gear. Try to sense to point when you need to switch to second gear. This means the engine isn’t yet screaming, but you are feeling the natural inclination to gain more speed. The clutch will disengage easily. 

Should the engine start to scream, this means you’ve hit the red line, otherwise known as the built-in limiter. The limiter is placed in the engine to ensure the bike doesn’t overextend itself and burn up. 

If you shift a gear up too soon, the bike could stall or choke. Restart the bike. Try again. Keep working through the gears until you can hear and feel when it is time to gear up. 

Shifting Smoothly

You will notice that there’s no mathematical equation to figure out the “when” behind shifting. Every bike has a unique behavior that depends on how you handle it. For instance, if the bike jerks when you release the clutch, you’re being too abrupt. If the bike tends to lurch during shifts, you’re applying too much throttle. If the motorcycle’s speed dips during shifting, you need to rev the engine more between gear changes. Pay attention to the clutch, throttle, and gear selector, because these all interact and are dependent on one another. 

Mechanics of Movement

Let’s back-up for a moment. Now that you have this idea in your mind that you need to listen and feel and understand with muscle memory what to do when shifting, it’s time to talk about what is happening inside the bike while you’re doing the actions. 

The clutch is the first thing you touch when it’s time to shift gears, unless you have an automatic motorcycle or a quick shift. Once the clutch is engaged, meaning the lever is out and power is send to the rear tie, little springs press on the clutch plate that connect the primary drive to the part that rotates from the pistons going up and down. 

When you pull the lever, the plate separates and releases the connection to the motor. In this moment, you can change gears. 

That’s when you take your foot and move the gear selector. On the gear selector is a piece called a collar that has “dogs.” This dogs mesh together with the fork in the same way you interlace your fingers. When you move your foot up and down on the selector, the dogs and fork connect to help change the gear. Then, you find the right gear and accelerate. 

Keep this in mind while reading the next two sections about upshifting and downshifting. 

Upshifting

Most of this article has been devoted to upshifting. Upshifting is easier than downshifting, because you are accelerating. This means that if you do any of the steps of shifting a little too quick, there’s less of an impact. Of course, this could result in a sudden jolt of power to the rear wheel, causing the front tire to come off the ground. 

(Note: You should only practice stunts in a controlled environment and when you have gained enough experience.) 

Downshifting

On the opposite end of upshifting is downshifting, which tends to go a little less smoothly. If you release the clutch too quickly while downshifting, the sudden downward change can cause the gear to slow down the rear tire, compressing the front end, and causing a lack of traction in the back end. You need to be able to control the release of the clutch. 

Be careful when rounding corners and decreasing your gears for this reason. You don’t want to suddenly lose traction right when you need more grip on the asphalt. That could cause the bike to skid to the side. 

False Neutral

When downshifting, you could accidentally hit a false neutral. This can happen anywhere there shouldn’t be a neutral, including between 3rd and 4th or 4th and 5th and so on. This could happen if the dogs don’t connect with the fork when selecting gears. There is power loss to the rear wheel. 

If you end up in a false neutral, pull on the clutch, and put the bike into a higher gear. You can prevent excessive damage to the bike. Be quick and make sure you move into the correct once you get out of false neutral. 

With that, you should be able to master the basics of shifting. Practice the timing of the clutch release and working with the gear selector for a bit. You will soon be able to shift between gears like someone who has been riding for many years. 

Liked this article and want more beginner motorcycle tips? Check out my YouTube channel and don’t forget to hit that subscribe button.

Scroll to top