
-
The Benefits of Yoga for Sportbike Riders
Sportbike riding, with its high speeds and sharp turns, demands a lot from riders. It requires not just physical strength and endurance but also mental focus and flexibility. This is where yoga, an ancient practice known for its physical, mental, and spiritual benefits, can play a pivotal role. Integrating yoga into your routine can offer sportbike riders numerous advantages, enhancing their riding experience and overall well-being.
Key Takeaways
- Enhanced Flexibility and Balance: Vital for maneuvering and maintaining posture while riding.
- Increased Core Strength: Supports proper riding posture and reduces fatigue.
- Improved Mental Focus: Essential for concentration and quick decision-making on the road.
- Stress Relief: Yoga’s meditative aspects can help riders unwind and relax.
- Injury Prevention: Regular practice strengthens the body and aids in recovery.
Comparison Table: Yoga vs. Traditional Strength Training for Sportbike Riders
Aspect Yoga Traditional Strength Training Flexibility Significantly increases Limited increase Core Strength Builds through balance and posture Focuses on targeted muscle groups Mental Focus Enhances concentration and awareness Less emphasis on mental aspects Stress Relief High due to meditative practices Moderate, through physical exertion Injury Prevention High, with low-impact exercises Moderate, risk of overexertion Enhanced Flexibility and Balance
Yoga is renowned for improving flexibility. For sportbike riders, being flexible is crucial as it aids in maneuvering the bike more effectively and prevents muscle strains and injuries. Yoga poses or asanas stretch and elongate the muscles, increasing range of motion and making it easier to adopt the proper riding posture. Furthermore, balance is essential for sportbike riders, especially at high speeds and when taking tight turns. Yoga improves balance, which can help riders maintain control of their bike in challenging conditions.
Increased Core Strength
A strong core is vital for sportbike riders. It supports proper posture, helps manage the bike’s weight during turns, and reduces fatigue during long rides. Yoga poses are effective in strengthening the core muscles, including the abdominals, back, and pelvic muscles. A stronger core leads to better riding form, enhanced stability, and reduced risk of lower back pain, a common issue among riders.
Improved Mental Focus and Concentration
Riding a sportbike requires undivided attention and quick decision-making. Yoga can enhance mental focus and concentration through meditation and breathing exercises (pranayama). These practices help calm the mind, reduce stress, and increase awareness, allowing riders to stay focused and react promptly to unexpected situations on the road.
Stress Relief and Relaxation
The thrill of riding a sportbike can be exhilarating, but it can also be stressful, especially after navigating through traffic or challenging routes. Yoga offers an effective way to relax and de-stress. The combination of physical poses, controlled breathing, and meditation promotes relaxation, reduces cortisol levels (the stress hormone), and improves overall mood.
Better Breathing Techniques
Proper breathing is essential for maintaining endurance and focus. Yoga teaches various breathing techniques that can help sportbike riders control their breath, even under physical exertion. Learning to breathe deeply and evenly can improve oxygenation, enhance energy levels, and ensure that muscles receive the nutrients they need to perform optimally.
Injury Prevention and Recovery
Regular yoga practice can help prevent injuries by improving flexibility, strength, and balance. Additionally, yoga can aid in the recovery process after rides or in the event of an injury. Gentle yoga poses can help alleviate muscle soreness, accelerate recovery, and prevent stiffness, making it easier for riders to get back on their bike.
FAQs About Yoga for Sportbike Riders
-
How does yoga improve riding performance?
- Yoga enhances balance, flexibility, and mental focus, directly contributing to better riding techniques and endurance.
-
Can yoga reduce the risk of injuries from riding?
- Yes, by strengthening muscles, increasing flexibility, and improving balance, yoga helps prevent common riding-related injuries.
-
How often should riders practice yoga for the best results?
- Incorporating yoga 2-3 times a week can significantly benefit sportbike riders.
-
Are there specific yoga poses that are most beneficial for riders?
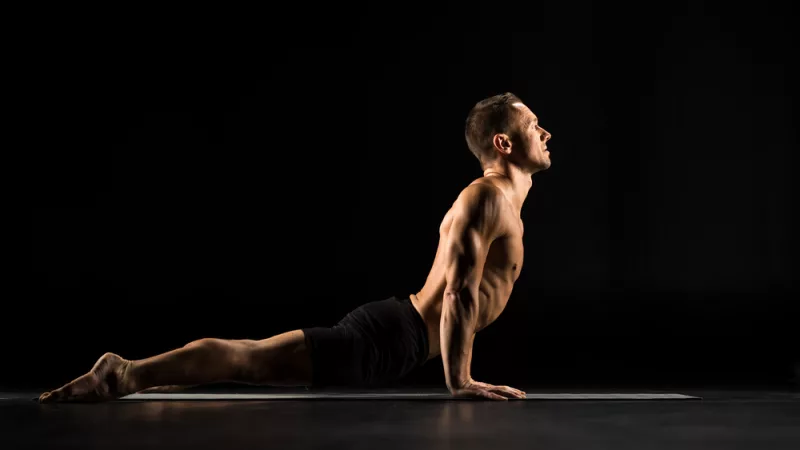
- Poses focusing on the core, legs, and back, such as the Plank, Warrior II, and Downward-Facing Dog, are particularly beneficial.
-
Can yoga help with post-ride recovery?
- Yes, gentle yoga can aid in muscle recovery, reducing stiffness and soreness after long rides.
-
Is yoga suitable for beginners or those new to fitness?
- Absolutely, yoga offers various levels of difficulty, making it accessible to beginners and seasoned athletes alike.
Conclusion
For sportbike riders, incorporating yoga into their fitness regimen can lead to significant improvements in flexibility, strength, mental focus, and overall riding performance. Whether it’s through attending a yoga class, following online tutorials, or practicing at home, the benefits of yoga can help riders enjoy a more comfortable, focused, and enjoyable riding experience.
Sportbike riding is not just about the machine and the road; it’s also about the rider’s body and mind. Yoga offers a holistic approach to enhance both, ensuring that riders can tackle every curve with grace, precision, and ease.
For more insights into fitness and wellness for riders, visit RunTheCity’s Fitness Blog.
- Home
- Fitness Blog
- Nutrition Blog
- Sportbike Blog
- How To Get Your Motorcycle License
- How Old Do I Have To Be To Ride A Motorcycle In New Jersey?
- What are the minimum requirements for motorcycle insurance in New Jersey?
- What Is The Main Cause Of Motorcycle Accidents?
- Gallery
- Yamaha YZF-R6 Service Manuals
- Yamaha R6 Specs 1998-2002 (First Generation)
- Yamaha YZF-R6 Specs 2003-2005 (Second Generation)
- Yamaha YZF-R6 Specs 2006-2016 (Third Generation)
- Yamaha YZF-R6 Specs 2017 (Fourth Generation)
- Sportbike Glossary
- Contact
- Shop


2 comments on Beginner’s Guide To Shifting Gears On A Motorcycle