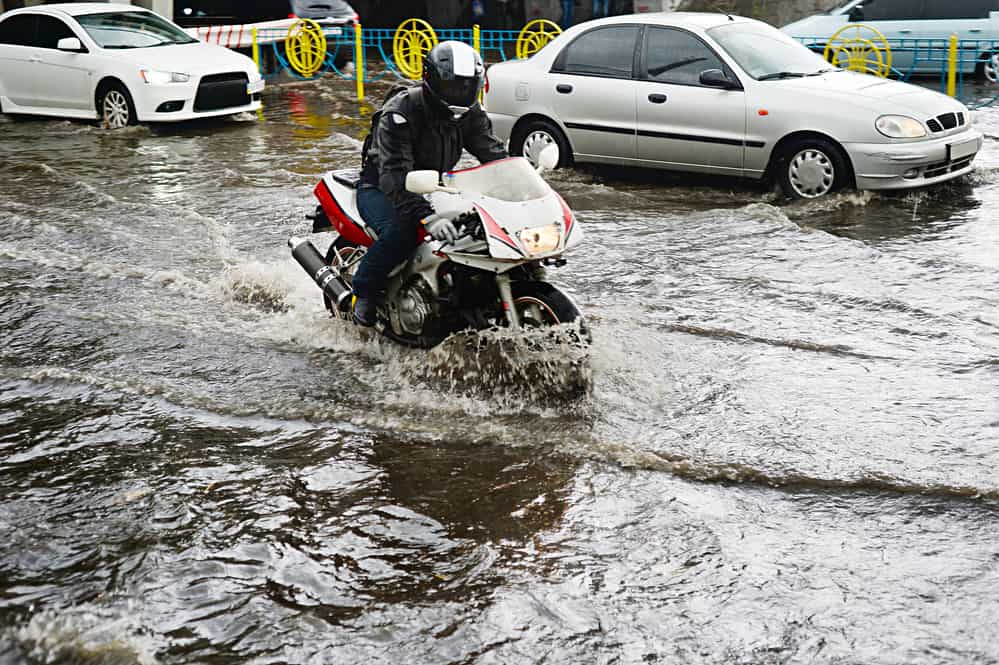
Be it a shower or deluge, rain can be your worst nightmare when on a motorcycle if you’re not properly prepared. During the spring and winter months, precipitation is unpredictable, and if you are in a rainy state, expect to get caught at least one shower while riding your bike. Rather than avoiding rainy days altogether, learn to ride your motorcycle in the rain.
Before The Ride
For maximum safety, inspect your bike to make sure it’s ready to tackle a ride in the rain.
• Fluids: Check your motorcycle to make sure there’s no brake fluid or oil leakage. While oil leaks aren’t very dangerous in dry conditions, when oil mixes with water, the road becomes a slick and dangerous course.
• Brakes: Make sure the brake pads have enough material left to help you with prompt stops in wet conditions.
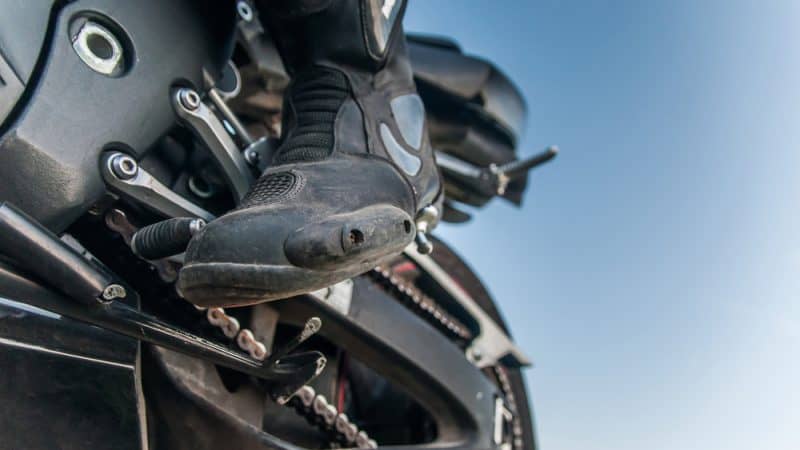
• Tires: Check that your tires have enough tread to push water away and grip the road. You also want to ensure they have enough air pressure. Under or over-inflated tires react differently in water, but both are potentially dangerous.
Weatherproof Gear
In order to keep you and your bike safe, you should have the correct riding gear and attire ready to go. You can choose between water-resistant and waterproof items. Water-resistant will shed water, but after a period of time, water will begin to permeate the material. Waterproof, on the other hand, will never allow for water to absorb into the material, unless you get completely submerged in water.
• Water-resistant or Waterproof Gear: Jackets and one piece suits should be zipped up tightly when riding in the rain to prevent water from seeping. Zippers should have a flap that covers the edges to protect the interstices. Cuffs on the jacket or coat need to be long enough to reach your gloves.
• Riding Boots and Gloves: More effective deterrents against complete saturation of your clothes. Both boots and gloves need to be tight enough to prevent water from dripping through. No one likes cold, wet socks.
• Helmets and Goggles: For the best protection, get a full-faced helmet. If you have a ½ or ¾ face helmet, get a pair of goggles. Pair the goggles with a waterproof balaclava that can shed water away from your face.
• Miscellaneous: If you have a saddlebag or storage unit, consider keeping a change of dry clothes with you. Also, keep plastic bags with you to keep valuables dry if you happen to get caught in a sudden rainstorm. Dry bags or waterproof backpacks can also help.
Be Cautious Of Road Conditions
Wet roads are dangerous for motorcyclists and other vehicle drivers, regardless of how prepared you may be. Even when the roads appear clean, they could be slick from oil. Here are some things to consider when traveling by motorcycle in the rain:
Less Traction
The first hour of rainfall is the most dangerous, because oils absorbed into the asphalt rise to the surface. During this time, it’s best to pullover at a rest stop about wait for about an hour. Once the rain has washed the road of oil and debris, you can head out again. Remember that this also means an increased braking distance.
Less Visibility
Sometimes, the fog or mist is too dense, or the rain is falling so hard you or other drivers can’t see. You can make yourself more visible to the traffic around you by wearing high visibility clothing and reflective patches.
Hydroplaning Risk
Hydroplaning occurs when water prevents the tire from making contact with the road. Reduce the risk of hydroplaning by avoiding painted lines, manhole covers, iridescent patches on the road and puddles (oil), tar snakes, metal crossing, and other places with reduced traction.
Also, you should reduce your speed when approaching puddles you can’t maneuver around. Start slowing down, squeeze the clutch, then coast through the puddle. If you’re going too fast, it’s better to maintain that velocity rather than slowing down abruptly, as this will reduce friction could cause fishtailing.
Decrease the risk of hydroplaning further with all-weather tires.
Nature’s Wrath
Stay aware of lightning, hail, ice, sleet, and other conditions that could transpire in a rainstorm. High winds can cause debris to fall into the road, and you might not see it due to decreased visibility. If it starts lightning, pull over.
Conclusion
Not every day is going to be perfect riding weather. Planning ahead and being prepared goes a long way when dealing with rainy conditions. Not only will you stay dry, but you will arrive at your destination safely.
Want more riding tips? Head over to my YouTube channel. Subscribe to receive notifications and never miss an update.
You Might also like
-
How to Choose the Right Motorcycle Jacket
The motorcycle jacket is one of the most iconic artifacts of biker culture, especially in public consciousness. When people picture a motorcyclist, they tend to envision someone clad in a well-made, well-fitted leather jacket.
With the continuous advancement of material sciences, the constant diversification of motorcycles themselves, and the rather varied climates of a global society, there are a plethora of jackets to choose from.
You’re bound to find the jacket that’s ideal for you, but there are a few variables to consider, such as what you find comfortable, the climates you’ll be riding in, and the type of motorcycle you’re going to use.
The Four Motorcycle Jacket Styles
There are basically for style groups, when it comes to these jackets – Cruiser, Racing, Sport/Street and Adventure Touring/Dual Sport. Each of these has its own strengths, making them ideal for a specific riding style. Surprisingly, no single type of material/textile is standard for any given style of jacket either.
- Cruiser – This is the classic motorcycle jacket that most picture – the icon, the stereotype. While most commonly seen in leather, they’re also available in many other styles, with a focus on comfort and aesthetic. These are ideal for casual riders and those that use their motorcycle as transportation going about their daily lives.
- Racing – Racing jackets are distinctive for their tight fit and somewhat “space age” appearance. The tight fit is to prevent wind resistance, and the distinct appearance is due to flex panels designed to allow mobility while providing padding against abrasions from dangerous high-speed offs. They tend to have a narrower collar, and a zipper to fasten to racing pants (preventing ride up).
- Sport/Street – These jackets are a casual modification of racing jackets, taking the slower speeds into account. They’re distinguished by the less prominent flex panels and the looser fit focusing on comfort. Seasonal jackets of this sort also include insulation and ventilation to help keep the rider cool or warm in harsh conditions.
- Adventure/Dual Sport – This is a less common style of jacket, used primarily by those whom go on long rides across varied, often rough climates and terrains. They look like nothing more than a survival jacket imitating a racing jacket, with pockets for gear, layers of insulation and impact padding, and a form-hugging design with an additional fastening around the neck. These are ideal for winter riding, or those long trans-continental adventures.
Important Motorcycle Jacket Factors To Consider
There are important factors to consider, which will determine the material you choose, and the style of jacket most suited to your needs.
- Leather or Textile – The first decision you’ll want to make is if you want leather or textile. Leather has a classic look, and many regard it as quite comfortable. However, its real strength is in its resistance to abrasion. However, for comfort and versatility in multiple climates and weather conditions, textiles tend to outperform it. This all comes down to whether you want comfort in various climates, or wish to focus on the durability of leather.
- Visibility/Reflectivity – While many would argue that subtlety is a sign of good everyday design, a jacket that catches the eye can actually be a major boon to safety. You want people to see you, and be aware of your presence and location on the road!
- Liners and Armor/Padding – If you ride in a temperate area with both hot and cold weather, you may want to look for a jacket with removable or all-weather lining that can help keep you warm in the winter, without the jacket cooking you in the summer. Similarly, even if you’re not a dare devil (and you shouldn’t be!), focusing on padding/armor around the chest, back and shoulders is also important, as these are areas where damage can be the worst if you have a nasty off.
- Fitment – Finally, you want a jacket that fits you well, and comfortably. It can be hard to find one that’s a perfect fit, but many styles of jacket have fitment adjustments on the waist and slides on the sleeves, which provide just the right amount of hug or slack for your personal comfort standards. You don’t want to wear a jacket that’s too tight or constrictive, cutting off circulation. The fatigue from this can lead to serious dangers.
To learn more about the different styles of jackets, which ones suit which styles of riding, and much more about the adventurous world of motorbiking, subscribe to my YouTube channel today!
Post Views: 6,928 -
Beginner’s Guide To Shifting Gears On A Motorcycle
An underrated aspect of learning how to ride a motorcycle goes beyond turning and popping wheelies. No, it’s something seemingly much more simple than that. Do you shift? Sure, shifting gears should be easy, because it’s a basic function; but shifting gear does have a layer of complexity that beginning cyclists could have problems mastering right away.
Here’s everything you need to know about shifting gears on a motorcycle.Motorcycle Gears Basics
The three basic controls are ones that you might already know—the throttle, the clutch, and the gear selector. You use the throttle to rev the engine, the clutch to engage and disengage the brakes (transmission), and to select gears. For instance, if you pull the left hand clutch towards you, the engine revs without ever moving the bike.
The gear pattern can be clicked through by using the gear selector lever and is moved by your left foot. Most bikes have the following gears, starting with the lowest first:
• First gear
• Neutral
• Second gear
• Third gear
• Fourth gear
• Fifth gear
• Sixth gear (depending on the bike)
As you can see, shifting fears is sequential. Up or down, neutral (N) is always put between 1st and 2nd gear.Technique For Motorcycle Shifting
It’s best to learn the proper technique required to maneuver through shifting gears before learning how to do anything else.
Steps of the proper shifting technique:- Disengage the clutch. Use your left hand to pull it towards you.
- Select the correct gear by using your left food on the shifting lever.
- Slightly rev the engine if shifting up.
- Gradually release the clutch. Don’t pop it.
- Feather the throttle while releasing the clutch to accelerate smoothly.
- Continue revving if you which to switch to another gear in succession. Otherwise, find a nice cruising speed to maintain.
Shifting With Sound and Feel
Have you ever heard wailing motorcycle engines on the road? You’ve probably thought to yourself, “Is that rider even shifting?” That’s you using the basic rule of sound. In basic terms, if an engine starts to scream, you shift to an upper gear. If the engine starts to grumble, then shift the engine lower.
There a many methods to help you do this properly. Beginners should only focus on the simplest method. Afterwards, you can experiment.
Start off by riding in first gear. Try to sense to point when you need to switch to second gear. This means the engine isn’t yet screaming, but you are feeling the natural inclination to gain more speed. The clutch will disengage easily.
Should the engine start to scream, this means you’ve hit the red line, otherwise known as the built-in limiter. The limiter is placed in the engine to ensure the bike doesn’t overextend itself and burn up.
If you shift a gear up too soon, the bike could stall or choke. Restart the bike. Try again. Keep working through the gears until you can hear and feel when it is time to gear up.Shifting Smoothly
You will notice that there’s no mathematical equation to figure out the “when” behind shifting. Every bike has a unique behavior that depends on how you handle it. For instance, if the bike jerks when you release the clutch, you’re being too abrupt. If the bike tends to lurch during shifts, you’re applying too much throttle. If the motorcycle’s speed dips during shifting, you need to rev the engine more between gear changes. Pay attention to the clutch, throttle, and gear selector, because these all interact and are dependent on one another.
Mechanics of Movement
Let’s back-up for a moment. Now that you have this idea in your mind that you need to listen and feel and understand with muscle memory what to do when shifting, it’s time to talk about what is happening inside the bike while you’re doing the actions.
The clutch is the first thing you touch when it’s time to shift gears, unless you have an automatic motorcycle or a quick shift. Once the clutch is engaged, meaning the lever is out and power is send to the rear tie, little springs press on the clutch plate that connect the primary drive to the part that rotates from the pistons going up and down.
When you pull the lever, the plate separates and releases the connection to the motor. In this moment, you can change gears.
That’s when you take your foot and move the gear selector. On the gear selector is a piece called a collar that has “dogs.” This dogs mesh together with the fork in the same way you interlace your fingers. When you move your foot up and down on the selector, the dogs and fork connect to help change the gear. Then, you find the right gear and accelerate.
Keep this in mind while reading the next two sections about upshifting and downshifting.Upshifting
Most of this article has been devoted to upshifting. Upshifting is easier than downshifting, because you are accelerating. This means that if you do any of the steps of shifting a little too quick, there’s less of an impact. Of course, this could result in a sudden jolt of power to the rear wheel, causing the front tire to come off the ground.
(Note: You should only practice stunts in a controlled environment and when you have gained enough experience.)Downshifting
On the opposite end of upshifting is downshifting, which tends to go a little less smoothly. If you release the clutch too quickly while downshifting, the sudden downward change can cause the gear to slow down the rear tire, compressing the front end, and causing a lack of traction in the back end. You need to be able to control the release of the clutch.
Be careful when rounding corners and decreasing your gears for this reason. You don’t want to suddenly lose traction right when you need more grip on the asphalt. That could cause the bike to skid to the side.False Neutral
When downshifting, you could accidentally hit a false neutral. This can happen anywhere there shouldn’t be a neutral, including between 3rd and 4th or 4th and 5th and so on. This could happen if the dogs don’t connect with the fork when selecting gears. There is power loss to the rear wheel.
If you end up in a false neutral, pull on the clutch, and put the bike into a higher gear. You can prevent excessive damage to the bike. Be quick and make sure you move into the correct once you get out of false neutral.
With that, you should be able to master the basics of shifting. Practice the timing of the clutch release and working with the gear selector for a bit. You will soon be able to shift between gears like someone who has been riding for many years.
Liked this article and want more beginner motorcycle tips? Check out my YouTube channel and don’t forget to hit that subscribe button.Post Views: 423 -
Where Can I Sell My Motorcycle?
If you have made the decision to sell your motorcycle, whether because you want to upgrade or because you have different priorities, knowing where to sell your bike is as important as knowing what to ask for it.
Selling your bike is already a difficult enough decision in many cases, so there is no need for the added stress of knowing the best place to sell your motorcycle. These tips can help you find the perfect place to sell your bike and will provide you with some tips that could make the process go more smoothly. You can find a few more tips on how to sell your motorcycle here.
Where Can I Sell My Motorcycle Offline?
Selling a motorcycle offline may not be as difficult as you think. You can place a “For Sale” sign on the bike when it is parked in your yard and it is possible someone riding by may decide it is the perfect bike for them. You can also take out an ad in the classified section of your local newspaper, although you will need to pay for the ad whether the bike sells or not. If there is a bulletin board in your neighborhood where people post about lost pets or yard sales, ask if you can post a sign about your motorcycle.
Tell your friends, family and co-workers that your bike is for sale. They may know someone who is in the market.
If you are selling your bike because you want to upgrade, talk to the dealer about trading in your old bike on a new one. Keep in mind that a dealer may offer you less for the bike than you could get if you sold it yourself, but it would eliminate the hassle of selling it yourself.
- Dealership
- Local Newspaper
- Front Lawn
- Flea Market
- Racetrack
- Motorcycle Show
Where Can I Sell My Motorcycle Online?
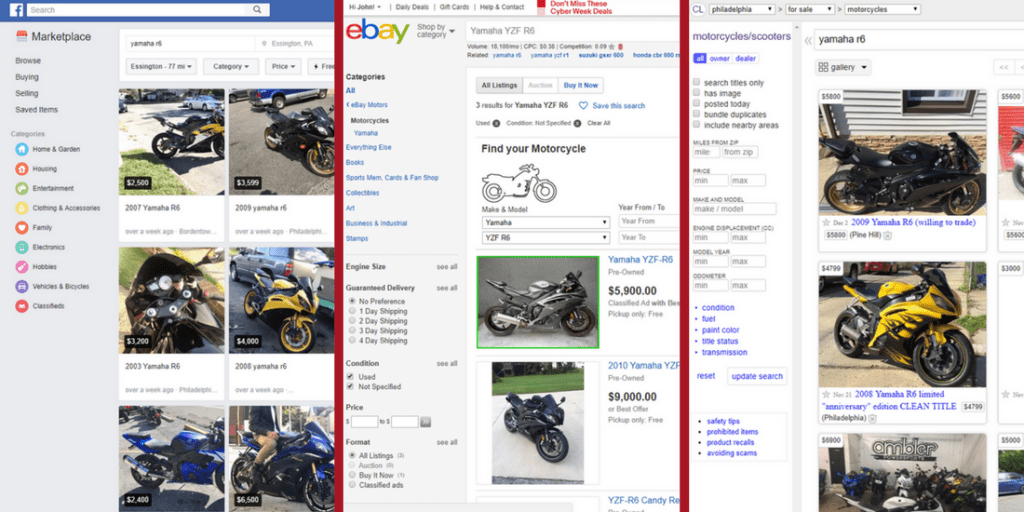
There are many different online options you can use to sell your bike. Craigslist is a free online advertising service, but keep in mind that some of the people who use the service are not above-board. If a buyer wants to purchase the bike from a Craigslist ad, insist on cash or certified funds at the time of the sale.
Ebay is another option for selling your bike, especially if it is unique or hard-to-find. You do not pay for listing your bike on Ebay until it sells and the buyer will pay for any shipping costs. It could be difficult, however, to find a company that will ship your bike so you want to research shipping prior to listing the bike for sale.
Facebook Marketplace
Recently Facebook Marketplace has become really popular for buying and selling motorcycles and motorcycle parts. You can discover bikes for sale near you. Easy to use on your phone or your desktop, and most people already have a Facebook account.
Take a look at a few other places you can sell your sportbike online:
The Best Apps to Sell My Motorcycle

One option for selling your bike online, designed specifically for buying or selling motorcycles, is RumbleOn. The site is available as a mobile app that allows you to put in all the info about your bike, take photos and upload to the site. RumbleOn sends you a Cash Offer Voucher that is good for three days. If you agree, they come get the bike and handle all the paperwork.
CycleTrader is another app that allows you to sell motorcycles and also includes reviews available online.
These apps are available in the Apple or Google Play Store:
Google Play Store Apps
On Apple Itunes Apps
If you want more information on selling your motorcycle or need tips on getting the best price for your bike, subscribe to our YouTube channel.
 Post Views: 32,455