


-

Exploring the World of Yamaha Sportbikes: A Beginner’s Guide
If you’re new to the world of sportbikes, Yamaha is a great place to start. With a wide range of models, there’s a Yamaha sportbike for every rider, whether you’re a beginner or a seasoned pro. In this guide, we’ll take a closer look at what Yamaha has to offer and help you find the perfect sportbike for your needs.
Understanding the Different Types of Yamaha Sportbikes
When it comes to sportbikes, Yamaha offers a wide range of models to choose from, each with their own unique characteristics and features. Understanding the different types of Yamaha sportbikes can help you narrow down your options and find the perfect bike for your needs.
- Sportbikes: These are the most powerful and agile bikes in Yamaha’s lineup, built for speed and handling. They include models like the R1, R7, R6, and R3. These bikes feature aerodynamic bodywork and are designed to be ridden at high speeds. They typically have high-performance engines and advanced suspension systems, making them ideal for track riding and sporty street riding.
- Supersports: These are similar to sportbikes but with a more comfortable riding position and slightly less power. They include models like the FZ-09 and FZ1. These bikes are built for riders who want the performance of a sportbike but with a more relaxed riding position. They typically have slightly detuned engines and more comfortable seats, making them a great option for long-distance riding.
- Naked Bikes: These are sportbikes with no fairings or bodywork, giving them a more raw, stripped-down look. They include models like the FZ-07 and FZ-10. These bikes are designed to be ridden in a more upright position and often have more accessible power and torque. They’re more versatile than sportbikes and can be used for both city and highway riding.
- Sport Touring Bikes: These are sportbikes with added features for long-distance riding, such as comfortable seats and large storage capacity. They include models like the FJR1300 and Super Ténéré. These bikes have more comfortable seating, wind protection, and luggage capacity. They’re designed for long-distance riders who want the performance of a sportbike but with the added convenience of touring features.
By understanding the different types of Yamaha sportbikes, you can make a more informed decision about which bike is right for you. Whether you’re a beginner looking for an entry-level bike or an experienced rider looking for a track-ready machine, Yamaha has a sportbike that will fit your needs.

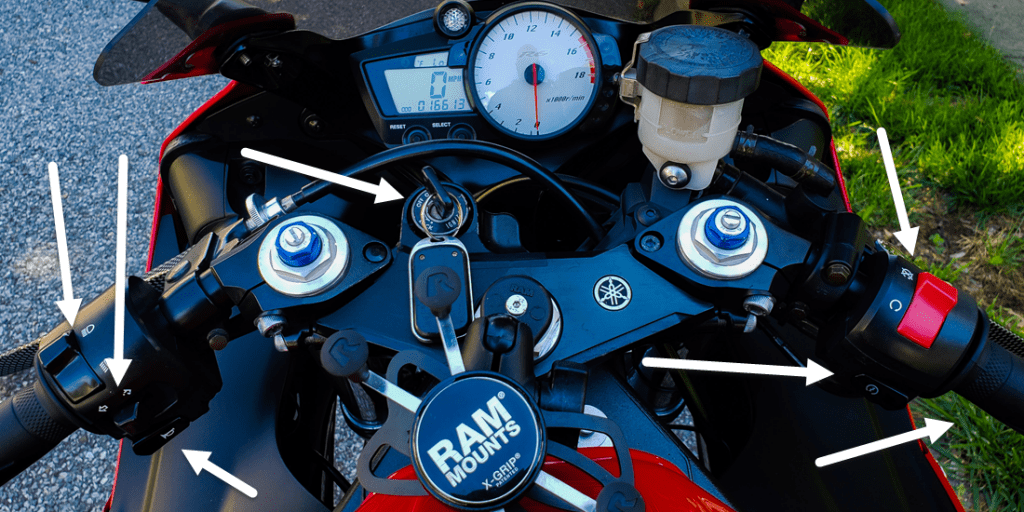
Getting to Know the Yamaha R Series
The Yamaha R Series is a line of sportbikes that is well-known for its high-performance engines and advanced suspension systems. The R Series includes models like the R1, R6, and R3. These bikes are designed for riders who want the ultimate in speed and handling, and are some of the most powerful and agile bikes in Yamaha’s lineup.
- Yamaha R1: The R1 is the flagship model of the R Series. It is powered by a 999cc liquid-cooled, inline four-cylinder engine that produces over 200 horsepower. The R1 also features a slipper clutch, advanced suspension system, and a quick-shifter. This bike is designed for experienced riders who want the ultimate in speed and handling.
- Yamaha R6: The R6 is another popular model in the R Series. It is powered by a 599cc liquid-cooled, inline four-cylinder engine that produces over 130 horsepower. The R6 also features a slipper clutch, advanced suspension system, and a quick-shifter. This bike is designed for experienced riders who want a sporty, high-performance motorcycle with a more manageable power output.
- Yamaha R3: The R3 is the entry-level model of the R Series. It is powered by a 321cc liquid-cooled, inline twin-cylinder engine that produces over 41 horsepower. The R3 also features a slipper clutch, advanced suspension system, and a quick-shifter. This bike is designed for beginner riders who want to experience the thrill of a sportbike, but with a more manageable power output.
Overall, the Yamaha R Series is a line of high-performance sportbikes that is perfect for riders who want the ultimate in speed and handling. Whether you’re an experienced rider looking for a track-ready machine or a beginner looking for an entry-level bike, the R Series has a model that will fit your needs.
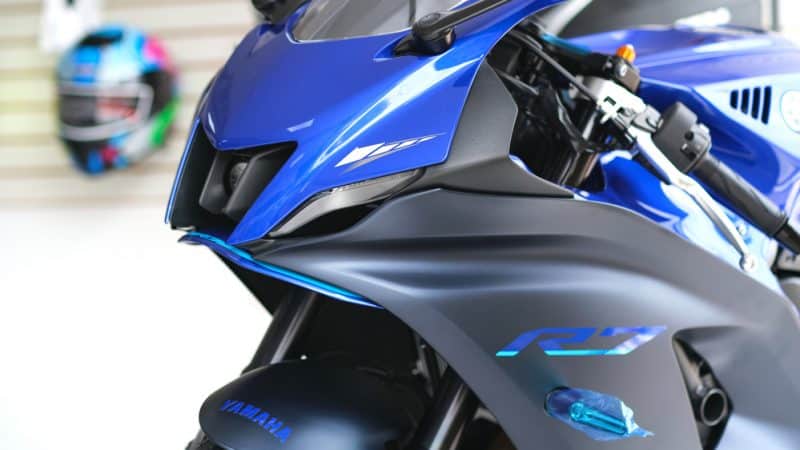
Yamaha R7: The Controversial Model
The Yamaha R7 was a limited edition sportbike that was produced by Yamaha from 1999 to 2002. The bike was based on the YZF-R1, but featured a smaller engine and a more compact frame. The R7 was designed to compete in the Superstock class of road racing, and it was quite successful in that regard.
However, the R7 was also notorious for its high price tag and limited availability. At the time, it cost significantly more than the standard R1, and only 500 units were produced each year. This made the R7 a highly sought-after bike, but also one that was difficult to obtain.
Another controversial aspect of the R7 was its engine. The R7 was powered by a 749cc liquid-cooled, inline four-cylinder engine that produced around 120 horsepower. This was less than the standard R1, which produced around 150 horsepower. Some critics felt that the R7’s engine was underpowered for its price tag, while others praised its smooth power delivery.
Despite its controversies, the Yamaha R7 remains a highly respected bike among sportbike enthusiasts. Its rarity and exclusivity make it a highly desirable bike, and its performance on the track is still highly regarded. However, it is important to remember that the R7 was designed for a specific purpose, as a Superstock racing bike, and it’s not a bike for everyone. It might not be suitable for daily riders or for those who want a more versatile motorcycle.
Other Yamaha Sportbikes to Consider
In addition to the R Series, Yamaha offers a variety of other sportbikes that are worth considering. Some of the other popular models include:
- Yamaha FZ Series: This is a line of sportbikes that is designed for riders who want a balance of speed and practicality. The FZ Series includes models like the FZ-09, FZ-07, and FZ-10. These bikes are powered by liquid-cooled, inline four-cylinder engines and feature advanced suspension systems. They are perfect for riders who want a sporty motorcycle that can be used for both commuting and weekend rides.
- Yamaha MT Series: This is a line of sportbikes that is designed for riders who want a more aggressive riding position. The MT Series includes models like the MT-09, MT-07, and MT-10. These bikes are powered by liquid-cooled, inline four-cylinder engines and feature advanced suspension systems. They are perfect for riders who want a sporty motorcycle that can be used for both commuting and weekend rides, but with a more aggressive riding position.
- The V-Max: This is a muscle bike that is powered by a massive 1,679cc liquid-cooled, V4 engine. It produces over 170 horsepower and features advanced suspension systems. It is designed for experienced riders who want a powerful and unique motorcycle that can be used for both commuting and weekend rides.
- The Super Ténéré: This is a adventure bike that is powered by a liquid-cooled, parallel twin-cylinder engine. It produces over 110 horsepower and features advanced suspension systems. It is designed for experienced riders who want a powerful and unique motorcycle that can be used for both commuting and weekend rides.
Overall, Yamaha offers a wide range of sportbikes that are perfect for riders of all experience levels. Whether you’re a beginner looking for an entry-level bike or an experienced rider looking for a high-performance machine, Yamaha has a model that will fit your needs.
Choosing the Right Yamaha Sportbike for You
When choosing a Yamaha sportbike, it’s important to consider your experience level, riding style, and budget. If you’re a beginner, the R3 or FZ-07 may be a good place to start. If you’re an experienced rider looking for a track-ready bike, the R1 or R6 may be a better fit. And if you’re looking for a sporty yet versatile ride, the FZ-09 or FZ1 may be the perfect choice.
In conclusion, Yamaha has a lot to offer for sportbike riders, from entry-level bikes to track-ready machines. Take the time to research and compare different models, and make sure to test ride a few before making a decision. With the right Yamaha sportbike, you’ll be able to enjoy the thrill of the ride and push your limits on the road or track. Don’t forget to also consider the cost of ownership, including insurance, maintenance, and accessories. Overall, Yamaha Sportbikes are a great choice for any rider looking for a high-performance motorcycle that offers a balance of power, handling, and versatility. Happy riding!
-
What Every Rider Should Know About Road Rash
Road rash isn’t a punchline to a joke about bad motorcycle handling or old video game. Road rash, also called “friction burn,” is a serious injury. The severity of the wound is measured by degrees, the same as you would a chemical or fire burn. Since the skin is the largest organ of our bodies, getting road rash opens you up to other vulnerabilities, such as infection. But there is more to understand about road rash than these points.
Let’s look at this serious injury that can happen to anyone and learn how to classify and treat various types of road rash.
The Different Types of Road Rash
Not every bout of road rash is created equal. There are three main types of road rash:
- Avulsion – the skin is scraped away. Sometimes fat, muscle, and even bone will be exposed.
- Compression – where the body is caught between two objects, such as the motorcycle and the road. This results in bruising, broken bones, and damaged muscle.
- Open wound – usually require stitches. Open wound road rash might even require skin grafting.
Aside from the 3 different types, there are 3 degrees of damage:
- First degree – the first layer of the skin is red. Does not require medical treatment and will heal well enough on its own.
- Second degree – the first layer of skin, known as the epidermis, is broken. There can be bleeding and debris stuck in the wound. Usually requires little medical treatment and can heal with no scarring or lasting damage.
- Third degree – skin has been peeled away, leaving tissue, fat and sometimes bone exposed. Victims often need skin grafting.
The degrees of the crash depends on factors such as the force of the impact with the ground, the type of surface where the crash takes place, and whether safety gear was equipped.
Road rash will often occur in places that come in contact with the abrasive surface, either when attempting to catch oneself or when rolling or getting dragged. The outside of the legs, knees, palms, thighs, shoulders, and face are usually where road rash occurs.
Complications of Road Rash
Seek medical treatment immediately if you experience any of the following with road rash:
- Severe pain
- Inability to move affected region
- Cuts on the face that are larger than a ¼ inch
- Cuts on the body that are larger than a ½ inch
- Bleeding doesn’t stop
- Gaping wound remains opened with you relax the body
- Fat is visible in the exposed tissues
- Road rash is paired with other injuries, including possible concussion or broken bones.
Any open wound should be treated with antibiotics within six hours. Otherwise, you are at risk of infection.
Treatment and Recovery From Road Rash
Depending on the severity of the road rash, you can oftentimes treat it yourself. In that event, do the following:
- Stop any bleeding.
- Wash your hands with soap and water.
- Rinse the wound thoroughly.
- Wash the wound with soap, water, and then use some witch hazel.
- Apply a topical antibiotic.
- Bandage the wound.
- Change the dressing.
Note: During the recovery, the skin will undergo healing from the deepest layers to the top. It might get scabs. Do not pick the scabs. Instead, continue changing the bandages and applying topical antibiotics. Once the oozing stops, you can use petroleum jelly to keep the skin supple and lessen the scarring.
If you end up going to the doctor because of a deep wound, the medical professional might recommend using ibuprofen, a non-steroidal anti-inflammatory drug (NSAID), acetaminophen, or naproxen to deal with the pain.
Remember that because the skin has been opened by abrasion, you could be at risk for infection. Consider getting a tetanus shot. Tetanus boosters last 10 years, so if you had an injury where the epidermis or dermis of the skin has been injured, tetanus bacteria can enter the wound. At any time symptoms of infection begin, such as redness, swelling, warm or hot skin around the injury, tenderness, pain, or bloody ooze or yellowish pus, you could have an infection. Make sure to get to a doctor immediately.
Hopefully, you should now have an understanding of road rash and how serious it can be. Don’t ignore severe injuries after a fall. Drive safe and stay safe, so you can keep riding!


2 comments on Motorcycle Basics: Before You Start Riding