-

5 Letter Motorcycle Vanity Plate Ideas: Your Guide to Standout License Plates
Your motorcycle is an extension of your personality, a statement on two wheels. And what better way to personalize it than with a unique and eye-catching vanity plate? But coming up with the perfect 5-letter combination can be a challenge. Fear not, fellow riders! This guide will spark your creativity and help you find the ideal license plate to express your inner biker spirit.
Key Takeaways
- Unleash your individuality with a unique and personalized motorcycle vanity plate.
- Explore a variety of 5-letter ideas, from classic cool options to witty wordplay and location-inspired choices.
- Don’t forget to personalize it further with initials, birth year, or your biker nickname.
- Always check local regulations to ensure your chosen plate and bracket comply with safety and visibility requirements.
- Seek inspiration from online communities of motorcycle enthusiasts.
Comparison Table: Motorcycle Vanity Plate Ideas by Category
Category Example Classic Cool RIDER, SPEED, CRUISE Witty Wordplay BIKER, ZOOM, TWISTY Location Love [State Code], CANYON, COAST Personalized Touches Initials, Birth Year, Nickname Introduction: Unleashing Personality on the Road
Motorcycles aren’t just modes of transportation; they’re expressions of identity and freedom. A personalized license plate is a finishing touch that showcases your unique style, humor, or philosophy. This guide offers a collection of creative five-letter motorcycle vanity plate ideas, alongside tips for crafting your perfect plate. Whether you’re looking for inspiration or advice on how to secure your custom plate, we’ve got you covered.
Why Choose a 5-Letter Vanity Plate?
Five-letter plates are concise yet versatile, allowing for a wide range of expressions. They can spell out words, names, or acronyms that resonate with your personal story or your bike’s character. The brevity of these plates makes them easy to remember and recognize, adding an extra layer of personalization to your ride.
Top 5-Letter Motorcycle Vanity Plate Ideas
- RIDER – A straightforward choice that speaks volumes about your passion.
- SPEED – Perfect for the enthusiast who loves to push the limits.
- BEAST – For a powerful bike that commands attention.
- ROAMR – Embrace the spirit of adventure and the open road.
- TWIST – A nod to the twists and turns that make riding exhilarating.
- CRUISE – Perfect for relaxed rides and scenic journeys.
Witty Wordplay:
- BIKER – A straightforward and self-explanatory option.
- ZOOM – Captures the exhilarating feeling of acceleration.
- TWISTY – A playful reference to your love for winding roads.
- LEAN – Hints at your cornering skills (or aspirations!).
- SHIFT – A clever reference to the motorcycle’s essential gear changes.
Top 5-Letter Crypto Vanity Plate Ideas:
- HODL – A popular crypto term representing a long-term buy-and-hold strategy.
- SATOSHI – A tribute to Satoshi Nakamoto, the pseudonymous creator of Bitcoin.
- GWEI – The smallest unit of Ether, the cryptocurrency used on the Ethereum blockchain.
- MOON – A slang term expressing hope for a cryptocurrency’s price to rise significantly.
- FIAT – Refers to traditional currencies like USD or EUR, often contrasted with crypto.
Bonus Ideas:
- BTC – Abbreviation for Bitcoin, the first and most popular cryptocurrency.
- ETH – Abbreviation for Ether, the second-largest cryptocurrency by market capitalization.
- NFT – Stands for Non-Fungible Token, a unique digital asset representing ownership of something.
- DEFI – Short for Decentralized Finance, a financial system built on blockchain technology.
- MINER – Refers to individuals who use computers to validate cryptocurrency transactions and earn rewards.
Location Love:
- [State Code] – Show your state pride with a simple and bold choice.
- CANYON – For those who love carving through mountain passes.
- COAST – Perfect for coastal cruisers.
- RIVER – If scenic riverside rides are your jam.
- [City] – Represent your hometown or favorite riding location.
Personalized License Plate Ideas for Motorcycles
When it comes to personalized plates, the options are limitless. Consider using:
- Nicknames: An affectionate or cool nickname that defines you.
- Hobbies: Words that represent your interests or hobbies outside of biking.
- In-jokes: Something that only you and your riding buddies understand.
- Initials: A classic choice with a personal touch.
- Birth year: A unique way to incorporate a personal detail.
- Favorite number: If it’s lucky or meaningful, flaunt it!
- Model name: Show off your love for your specific motorcycle.
Motorcycle License Plate Ideas: Beyond Words
Apart from text, consider the aesthetic of your plate. Some regions allow symbols, which can help your plate stand out even more. For example, a heart symbol can replace the word “love,” or a number can substitute for its written form.
License Plate Motorcycle Bracket
Choosing the right bracket is as important as the plate itself. A bracket that complements your motorcycle’s style while securely holding your plate is crucial. Consider these factors:
- Material: Durable materials like stainless steel or aluminum resist rust and wear.
- Design: From minimalist to ornate, select a bracket that matches your bike’s aesthetic.
- Installation: Ensure the bracket fits your bike’s make and model for a seamless installation.
License Plate Ideas for Motorcycles: Making It Unique
Your license plate should be as unique as your ride. Experiment with:
- Numbers: Use numbers to represent letters or significant dates.
- Creative Spelling: Play with phonetics to create memorable plate ideas.
- Mix and Match: Combine letters and numbers for a plate that stands out.
Beyond the Plate: Mounting and Inspiration
Once you’ve found your perfect 5-letter combination, finding a license plate motorcycle bracket is crucial for proper mounting and legal compliance. Check your local regulations to ensure your chosen plate and bracket combination adheres to safety and visibility requirements.
For further inspiration, explore online communities and forums dedicated to motorcycle enthusiasts. You’ll find a treasure trove of creative license plate ideas, motorcycle customization tips, and a supportive community of fellow riders.
Remember, your motorcycle vanity plate is a reflection of your unique style. So, have fun, be creative, and ride safe!
Conclusion: Your Plate, Your Pride
A personalized motorcycle license plate is more than just a legal requirement; it’s a statement. It’s an opportunity to showcase your creativity, personality, and passion for riding. With the ideas and tips provided, you’re well on your way to choosing a vanity plate that reflects your unique spirit. Remember, the best plate is one that brings a smile to your face every time you gear up for a ride.
Explore your options, follow the regulations, and make your motorcycle truly yours. Ride safe, and let your personalized license plate tell your story to the world.
Personalized Plates in New Jersey
FAQs:
-
Can I use special characters in my vanity plate?
- It depends on your region’s DMV rules. Some allow limited use of symbols, while others restrict plates to letters and numbers only.
-
How do I check if my desired plate is available?
- Most DMVs offer an online service where you can check the availability of your desired plate.
-
Is there an extra cost for personalized plates?
- Yes, personalized plates typically come with an additional fee over the standard registration cost.
-
How long does it take to receive my personalized plate?
- Processing times vary by region but expect several weeks from application to delivery.
-
Can I transfer my personalized plate to a new motorcycle?
- Yes, in most jurisdictions, you can transfer your personalized plate to a new vehicle, subject to DMV procedures and fees.
-
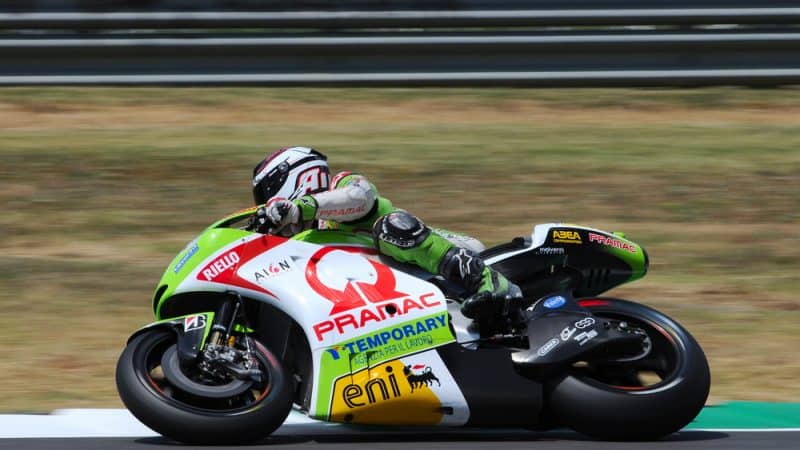
The Art of Cornering on a Sportbike
Cornering is an essential skill for sportbike riders, and it requires a combination of physical and mental techniques to be executed effectively. From maintaining control in a lean to anticipating turns and navigating curves, cornering is an art that requires practice, patience, and confidence. In this comprehensive guide, we’ll explore the fundamentals of cornering on a sportbike and provide tips and tricks to help you become a more confident and skilled rider.
Download RunThaCity’s Cornering on a Sportbike CheetSheet
Understanding the Physics of Cornering
The key to effective cornering on a sportbike is understanding the physics behind the maneuver. When you enter a turn, the centrifugal force of the turn pushes the bike away from the center of the turn, and the suspension compresses, causing the bike to lean in the direction of the turn. Maintaining control in a lean requires balancing the force of gravity, which tries to pull the bike down, with the centrifugal force, which tries to push the bike out.
By understanding the physics of cornering, you can gain a better appreciation for the forces acting on your bike and the techniques required to counterbalance these forces. For example, you can use your body weight to shift in the direction of the turn, which helps to balance the forces acting on the bike and maintain stability and control in a lean.
The physics of cornering on a sportbike involves a complex interplay between the forces of gravity, friction, and centripetal force. When a rider enters a turn, gravity pulls the bike towards the center of the turn, creating a natural tendency to lean into the turn. To counteract this gravitational pull and maintain balance, the rider must apply a countervailing force known as centripetal force. This force is generated by leaning the bike into the turn and applying a slight amount of pressure to the inside handlebar.
The amount of lean required to maintain balance in a turn is largely dependent on the speed of the bike and the radius of the turn. The faster the bike is moving, the more lean is required to maintain control. Conversely, the tighter the turn, the more lean is required. To achieve the optimal balance between speed and lean, riders must coordinate their inputs to the handlebars, throttle, and brakes.
Friction also plays an important role in the physics of cornering. The tires on a sportbike are designed to provide a high level of grip and traction, allowing the rider to carve through turns with confidence. However, this grip can be easily compromised by factors such as road surface, tire wear, and weather conditions. To maximize traction and grip, it is important to maintain the correct tire pressure and keep the tires in good condition, as well as adapting your riding style to the conditions of the road.
By understanding the physics of cornering, riders can develop a deeper appreciation for the dynamics of their sportbike and the techniques required to maintain control and stability in turns. With this knowledge, riders can make more informed decisions about their riding technique and make the necessary adjustments to their speed, trajectory, and body position to ensure a safe and enjoyable riding experience.

Body Position and Control
Effective cornering on a sportbike requires proper body position and control. To maintain balance and control in a lean, you need to keep your weight centered over the bike and use your body to counterbalance the forces acting on the bike. Your inside hand should grip the handlebars firmly, while your outside hand should be relaxed and ready to make adjustments. Your inside knee should be tucked into the tank, and your outside foot should be positioned on the peg for stability.
Maintaining proper body position and control is essential for effective cornering, as it allows you to respond quickly and effectively to changes in the road and the forces acting on the bike. By keeping your weight centered over the bike, you can maintain balance and control, and by using your body to counterbalance the forces acting on the bike, you can prevent the bike from tipping over in a turn.
Body position and control are critical components of effective cornering on a sportbike. Proper body position allows the rider to maintain balance and control over the bike, while also improving visibility and stability. The key elements of proper body position include:
- Lean Angle: The rider’s lean angle should be adjusted to match the speed and radius of the turn. As the speed increases or the turn tightens, the lean angle should increase accordingly. Riders should aim to maintain a smooth and gradual lean, avoiding sudden or excessive movements that can upset the balance of the bike.
- Weight Distribution: The rider’s weight should be shifted towards the inside of the turn, helping to counteract the gravitational pull towards the center of the turn. This can be achieved by shifting the rider’s body weight to the inside footpeg, while maintaining a firm grip on the handlebars.
- Upper Body: The rider’s upper body should be kept as relaxed and upright as possible, avoiding any unnecessary movements that can affect the balance of the bike. The rider should maintain a firm grip on the handlebars, using a light touch to control the bike’s movements.
- Lower Body: The rider’s lower body should be kept as still and relaxed as possible, avoiding any unnecessary movements that can affect the stability of the bike. The rider should maintain a firm grip on the footpegs, using their knees to grip the tank and maintain control over the bike.
By maintaining proper body position and control, riders can ensure a smoother and more stable ride, improving their ability to negotiate turns and respond to changing road conditions. However, it is important to note that body position and control should be adapted to the conditions of the road and the rider’s personal comfort and preference. With practice and experience, riders can develop a more refined and personalised approach to body position and control, improving their cornering skills and overall riding experience.
Braking and Acceleration Techniques
The timing and technique of braking and acceleration play a critical role in effective cornering on a sportbike. As you approach a turn, you should reduce your speed by applying the brakes smoothly and progressively. After entering the turn, you should ease off the brakes and maintain a constant speed, using the throttle as needed to maintain balance and control. As you exit the turn, you should smoothly apply the throttle to accelerate out of the turn and onto the straightaway.
Effective braking and acceleration techniques are essential for maintaining control and stability in a turn. By reducing your speed before entering a turn, you can reduce the forces acting on the bike and maintain control in a lean. By easing off the brakes after entering the turn, you can maintain a constant speed and use the throttle as needed to maintain balance and control. And by accelerating smoothly out of the turn, you can build up speed and exit the turn with confidence.
Braking and acceleration techniques are crucial components of effective cornering on a sportbike. These techniques allow the rider to control the speed and trajectory of the bike, improving stability and confidence in turns. The key principles of braking and acceleration techniques include:
- Braking: Braking should be performed as smoothly and progressively as possible, avoiding any sudden or jerky movements. The rider should aim to maintain a consistent speed throughout the turn, avoiding any sudden changes in speed that can affect stability. When braking, the rider should apply the front brake first, followed by the rear brake, adjusting the amount of pressure applied to each brake to suit the conditions of the road and the speed of the bike.
- Acceleration: Acceleration should be performed smoothly and progressively, avoiding any sudden or excessive changes in speed. The rider should aim to maintain a consistent speed throughout the turn, avoiding any sudden changes in speed that can affect stability. When accelerating, the rider should use the throttle to control the speed of the bike, adjusting the amount of throttle applied to suit the conditions of the road and the speed of the bike.
By combining proper braking and acceleration techniques with proper body position and control, riders can achieve a smoother and more stable ride, improving their ability to negotiate turns and respond to changing road conditions. However, it is important to note that braking and acceleration techniques should be adapted to the conditions of the road and the rider’s personal comfort and preference. With practice and experience, riders can develop a more refined and personalized approach to braking and acceleration, improving their cornering skills and overall riding experience.
Look Ahead and Anticipate Turns
Effective cornering on a sportbike requires you to look ahead and anticipate turns well in advance. By keeping your gaze fixed on the road ahead, you can spot obstacles and make necessary adjustments to your speed and trajectory. You should also scan the road for hazards, such as gravel, potholes, or wet spots, and avoid them whenever possible.
Looking ahead and anticipating turns is a critical component of effective cornering on a sportbike. By looking ahead and anticipating turns, riders can improve their visibility, reaction time, and stability, allowing them to negotiate turns with greater confidence and control. The key principles of look ahead and anticipating turns include:
- Look Ahead: Riders should keep their gaze focused on the road ahead, looking several seconds ahead of the bike to anticipate turns and other road hazards. This allows the rider to react in a timely manner, avoiding any sudden or unexpected movements that can affect stability.
- Anticipate Turns: Riders should anticipate turns by scanning the road ahead for any changes in direction or road conditions. This allows the rider to prepare for the turn in advance, adjusting their speed, body position, and control accordingly.
- Plan Your Line: Riders should plan their line through the turn, anticipating the path of the bike and the trajectory of the turn. This allows the rider to negotiate the turn with greater control and stability, improving their ability to maintain a consistent speed and line.
By combining proper look ahead and anticipating turns with proper body position and control, riders can achieve a smoother and more stable ride, improving their ability to negotiate turns and respond to changing road conditions. However, it is important to note that look ahead and anticipating turns should be adapted to the conditions of the road and the rider’s personal comfort and preference. With practice and experience, riders can develop a more refined and personalised approach to look ahead and anticipating turns, improving their cornering skills and overall riding experience.
Practice and Refine Your Techniques
Effective cornering on a sportbike requires practice, patience, and confidence. While it may take some time to develop the skills and techniques required to corner with confidence, with practice and refinement, you can become a more skilled and confident rider. To improve your cornering skills, consider practicing on a safe and controlled environment, such as a track day or a closed course. You can also seek feedback from more experienced riders and instructors to help refine your techniques and identify areas for improvement.
Conclusion
Cornering is an essential skill for sportbike riders, and it requires a combination of physical and mental techniques to be executed effectively. From understanding the physics of cornering to maintaining proper body position and control, braking and acceleration techniques, and looking ahead and anticipating turns, there are many factors that contribute to effective cornering on a sportbike. With practice, patience, and confidence, you can develop the skills and techniques required to corner with confidence and enjoy a safer and more enjoyable riding experience.
-
Tips for Buying Your First Sportbike
Sportbikes are fast, flashy, and fun, but they are also complex machines that require a significant investment of time and money. Before you buy your first sportbike, it’s important to consider the following tips to make an informed decision and find the right bike for your needs.
Consider Your Riding Style:
Before you start shopping for a sportbike, it’s important to determine what type of riding you want to do. Do you want to push the limits of your bike on a racetrack or do you want a bike that’s comfortable for long-distance touring? Here are a few different styles of sportbikes to consider:
- Track-focused sportbikes: These bikes are designed for high-speed, aggressive riding on a racetrack. They have powerful engines, lightweight frames, and advanced suspension systems. They are not recommended for daily street riding as they are not well-suited for comfort and practicality.
- Street-oriented sportbikes: These bikes are designed for fast and nimble street riding. They are lightweight, have powerful engines, and are typically more comfortable than track-focused sportbikes. They are ideal for riders who want a sporty and fun riding experience on public roads.
- Sport-touring bikes: These bikes are designed for long-distance riding and offer the best of both worlds: performance and comfort. They are equipped with large fairings, windscreens, and comfortable seats, making them ideal for riders who want to cover long distances in comfort.
By considering your riding style and the type of riding you want to do, you’ll be able to narrow down your options and find the right sportbike for your needs.

Set Your Budget:
Sportbikes can be expensive, and the cost of ownership goes beyond just the purchase price. Before you start shopping, it’s important to set a budget and consider the ongoing costs of ownership, including insurance, maintenance, and upgrades.
Here are a few tips to help you stay within your budget:
- Determine how much you can afford to spend: Consider your monthly income and expenses, and determine how much you can comfortably afford to put towards your sportbike.
- Factor in insurance costs: Insurance is an essential part of owning a sportbike, and the cost can vary greatly depending on the type of bike and your location. Research insurance rates before you buy, and factor these costs into your budget.
- Plan for maintenance costs: Sportbikes require regular maintenance, and the costs can quickly add up. Make sure to factor in the cost of oil changes, tire replacements, and other routine maintenance items into your budget.
- Consider the cost of upgrades: Many sportbike owners like to make upgrades to their bikes, and the costs can quickly add up. Consider the cost of upgrades and factor these into your budget before you buy.
Remember, the most expensive bike is not always the best, and there are many affordable options that offer excellent performance and value. By setting a budget and considering the ongoing costs of ownership, you’ll be able to find the right sportbike that fits your needs and your budget.
Find the Right Size:
When buying a sportbike, it’s important to find the right size and fit to ensure maximum comfort and control while riding. Here are a few tips to help you find the right size:
- Consider your height, weight, and inseam length: The size of a sportbike can greatly affect how comfortable and in control you feel while riding. Use your height, weight, and inseam length to determine which bikes might be the right size for you.
- Test-ride several models: The best way to determine the right size is to test ride several different models. This will give you a chance to get a feel for each bike and see how well it fits you.
- Check the seat height: When test riding, pay attention to the seat height. You should be able to comfortably reach the ground with both feet while seated on the bike.
- Consider the reach to the handlebars: The reach to the handlebars is also important, as it affects your comfort and control while riding. Make sure the reach is comfortable and that you can easily reach the controls.
- Check the weight: The weight of a sportbike can greatly affect how comfortable and in control you feel while riding. Be sure to take note of the weight of each bike you test ride and consider how it affects the overall feel of the bike.
By considering your height, weight, and inseam length, and test riding several models, you’ll be able to find the right size and fit for your needs and ensure maximum comfort and control while riding your sportbike.
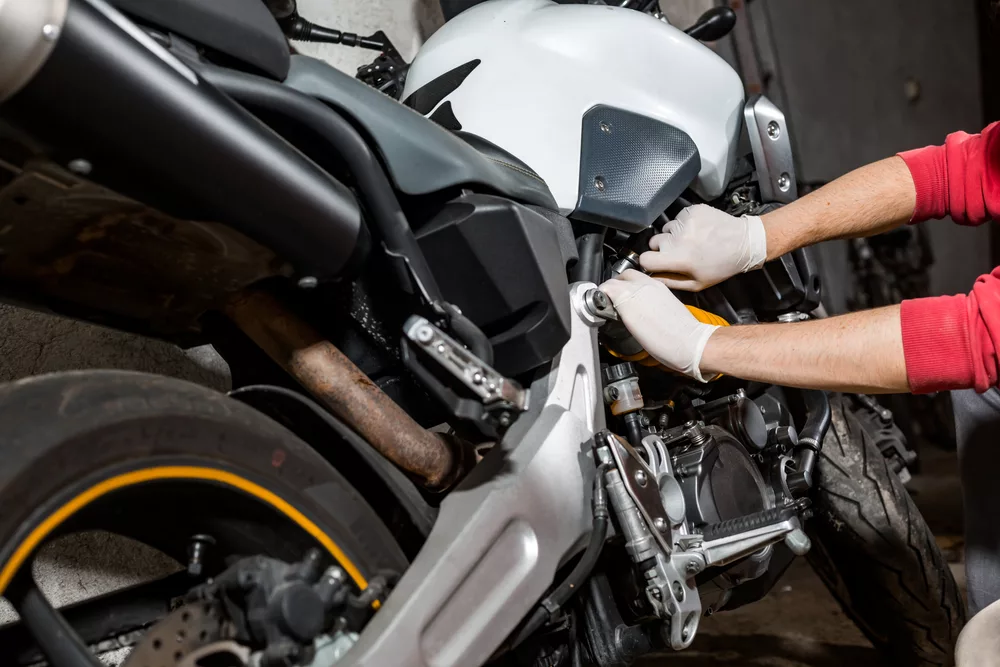
Inspect the Bike Carefully
Before you buy a sportbike, inspect it carefully for any signs of damage or wear. Check the wheels, tires, brakes, and suspension for any signs of damage, and make sure the engine runs smoothly and quietly. If you’re unsure about anything, have a mechanic inspect the bike before you make a purchase.
Additionally, pay attention to the bike’s overall appearance. Look for any signs of rust or corrosion, especially in areas such as the exhaust pipes, frame, and suspension components. Check the battery to make sure it holds a charge and has enough power to start the engine. Test the bike’s electrical system to ensure all lights, signals, and gauges are working properly. Check the air filter and oil level, and make sure the bike has been properly maintained and serviced according to the manufacturer’s guidelines.Another important aspect to consider is the bike’s history. Make sure to request a vehicle history report to determine if the bike has been in any accidents, or if it has a clean title. If you’re buying a used bike from a dealer, ask about the previous owner and if the bike has been well taken care of. If you’re buying from a private seller, be cautious and take a close look at the bike to see if it has any signs of abuse or neglect.
It’s also important to test ride the bike before making a purchase. This will give you a good feel for the bike’s handling, braking, and acceleration. Take the bike on different types of roads, including highways, twisty roads, and stop-and-go traffic, to get a good idea of how it handles different conditions. This will also help you determine if the bike is comfortable for you and if it’s the right size and fit for your needs.
In summary, thoroughly inspecting a sportbike before making a purchase is a critical step in ensuring you’re getting a high-quality, reliable machine that will provide you with years of riding enjoyment.
Research the Model and Brand
When researching a sportbike, it’s important to take a deep dive into the model and brand you’re interested in. This will give you an understanding of the bike’s history, reliability, and any common problems riders have experienced. Start by reading reviews from trusted sources to get a better understanding of the bike’s strengths and weaknesses. You can also visit online forums and read what other riders have to say about their experiences with the bike. Ask questions and take note of any common complaints or issues that have been raised. This information can be invaluable in helping you make an informed decision. Additionally, consider reaching out to the manufacturer or a dealership to learn about any current or upcoming models that may interest you. It’s always a good idea to do your due diligence before making a big purchase, and researching the sportbike you’re interested in is a key step in that process.
Conclusion
In conclusion, when it comes to buying your first sportbike, there are many factors to consider. From determining your riding style and setting a budget, to finding the right size and fit, and carefully inspecting the bike before making a purchase, each step is important in ensuring you make the right choice for your needs. Additionally, researching the model and brand you are interested in will give you valuable insight into the bike’s history, reliability, and common problems. With this information, you will be able to make an informed decision and enjoy many years of thrilling riding. Don’t be afraid to take your time and shop around, the right sportbike is out there waiting for you. Happy riding!