Changing engine oil is essential to maintaining the life of your beloved motorcycle. If you don’t consistently check the oil level and change the oil when it gets old or dirty, the lifespan of the motor is severely shortened.
Let’s get started.
How Often You Need To Change Motorcycle Oil
Most riders will ask the question, “How often do I need to change the motorcycle engine oil?” at least once. The answer depends on the make/model of your bike (we’ll be discussed a Yamaha YZF-R6), the type of oil you used, and how often you ride.
If you used a mineral-based engine oil (the simplest, cheapest kind), then you should change the engine every 2,000 miles if you’re riding frequently. If you don’t ride regularly, you can change your oil at least twice a year.
When using a semi-synthetic engine oil, change the oil once every 5,000-6,000 miles.
Lastly, if you use a fully-synthetic engine oil, change the oil after 7,000-10,000 miles.
Semi- and fully-synthetic motor oils are more expensive than mineral-based engine oil, but the plus side is that they last much longer. The only time when you might have to change before the recommended mileage, regardless of the motor oil type, is if you are riding your bike every single day or you commute a great distance frequently.
Yamaha YZF-R6 Oil Change Instructions
You can find the following information in the owner’s manual of your Yamaha YZF-R6. If you don’t have this specific Yamaha model, it’s recommended you find the specific instructions for your make and model, as the steps could be different.
- Checking the engine oil level:
- Put the motorcycle on a level surface and hold it in an upright position, as straight as possible. Slight tilts could result in a false read.
- Start the engine. Let the oil warm up for several minutes.
- Turn the motorcycle off again.
- Wait for the oil to settle. This may take a few minutes.
- Remove the engine oil dipstick. Wipe it clean with a cloth then insert the stick back into the fuel reservoir. Take a moment to look at the maximum and minimum oil level lines before testing if you’re not familiar with it. Don’t screw the stick in. Remove it again to get your reading.
- If the engine oil level is at or below the minimum level, remove the engine filler cap and add a sufficient amount of oil to get the level to the recommended spot.
- Insert then tighten the engine oil dipstick. Afterwards, install and tighten the oil filler cap.
During this stage of your oil check, you might find that you need to change the oil completely.
How To Tell If You Need An Oil Change
The normal color of oil is transparent, brownish, maybe even slightly black. When oil is “clean,” it works best for protecting and keeping the engine clean.
Now, “dirty” oil is when the water consistency is lost. It feels slightly gritty when rubbed between your fingers. The color will be darker, if not completely black, and it will have lost it’s transparency.
You might also notice that the engine is making bizarre noises when the oil is dirty. All these signs point to needing an oil change.
How to change engine oil on a Yamaha YZF-R6:
- Put the motorcycle on a level surface.
- Removing the cowling.
- Start the engine for several minutes. Once warmed, turn the bike off.
- Place an oil pan under the engine to collect used oil.
- Remove the engine oil filler cap, the engine oil drain bolt, and lastly the gasket to drain the oil from the crankcase.
- Once the oil is drained completely, replace the gasket and bolt, fill the tank to the recommended level, and then replace the engine oil filler cap.
When To Change The Oil Filter
Change the filter every time you change the oil or once every 2,000 to 3,000 miles if you’re using synthetic motor oil. You don’t want to ride around with a dirty, old oil filter because it traps any dirt, dust, debris, metal, and sludge that would otherwise harm your engine.
Not a frequent rider? Again, change your oil at least twice a year and pair that with a filter change.
Conclusion
To wrap everything up, frequent riders will need to change their oil more often than those who ride once in a while. The quality of the motor oil changes the mileage for oil changes, and synthetic oils will have the longest life. Make sure to check the oil level and consistency often so you can protect the engine and preserve the life of your ride.
Enjoyed this information and want more? Head over to my YouTube channel. Subscribe and receive notifications for every update.
You Might also like
-
How To Install A Voodoo Slip-On Exhaust
There are multiple reasons that people want to replace the stock mufflers that came installed on their motorcycles and replace them with aftermarket exhausts. Whether your muffler has become worn or you simply want to upgrade to a better-performing exhaust, replacing it is something that is commonly done by motorcycle owners everywhere. Here is how you can install the Voodoo Slip-On Exhaust.
1. Read the instructions until you understand them
Before you get started, make sure that you read the instructions and that you understand them. You shouldn’t dive in until you are certain that you understand what you are doing. Then, gather together the tools that you will need to install your new exhaust.
2. Loosen the joint where it connects
The way in which your muffler is connected will depend on the motorcycle that you own. You may be looking for a gasketed flange joint or a band clamp. When you find the joint, loosen it so that you can get ready to remove your old muffler.
3. Loosen the bracket for the muffler
After you have loosened the connection joint, you will next need to loosen the brackets for your muffler. You will need to make certain that you provide support to the muffler while you are loosening its bracket. If you don’t, the muffler may strike other parts on your motorcycle and cause some damage.
4. Take the old muffler off of your motorcycle
While mufflers for motorcycles are called slip-ons, removing your old muffler may still require you to use some force to dislodge it from your bike. After you have taken the old muffler off, store it somewhere safe.
5. Take your new muffler and slide it over your header pipe
You will be doing the same steps that you just completed when you install your new muffler, but you will be doing them in reverse. If you find that you are having trouble, stop and think about what you are doing.
6. Securing your new muffler
You will secure your new Voodoo exhaust by attaching it with band-style clamps or with brackets. If you have band-style clamps, they will work by tightening around your muffler to hold it in place. Brackets attach to both your motorcycle and your muffler. Make certain that you familiarize yourself with the instructions before trying to secure your muffler. If you have brackets, try tightening them with your fingers first so that you are less likely to damage the parts. After everything is in its proper place, reattach the gasket clamps, flanges or springs that you need to attach the muffler to your head pipe. Make sure that you do not use too much torque.
7. Wipe your new exhaust down
Before you hop on your motorcycle, make sure that you wipe your new muffler down to remove the oils that you left behind during the installation. If you don’t, it may be stained when it runs with the oils on the surface.
8. Look for leaks
Turn on your motorcycle and let it run while you look at it for leaks. You should check the top of the headers and the base of your slip-on exhaust.
Legal issues
Make sure that you understand what the law in your area requires for modifications to your motorcycle’s exhaust. Some modifications are only allowed off of the highways in some states.
Installing your new Voodoo Slip-On Exhaust is a relatively straightforward process. If you make certain to read the manuals and that you understand the laws in your area, you can soon have a great-looking and sounding muffler on your bike. -
How to Properly Maintain Your Sportbike
Understanding the Importance of Sportbike Maintenance
Owning a sportbike is an exciting and rewarding experience, but it also comes with responsibilities. Proper maintenance is essential to ensure the longevity and performance of your bike, and to keep you safe on the road. In this comprehensive guide, we’ll explore the key components of sportbike maintenance and provide tips and tricks for keeping your bike in top condition.
Download RunThaCity’s General Sportbike Maintenance Schedule
Regular Maintenance Schedules: The Key to a Long-Lasting Sportbike
Regular maintenance is key to keeping your sportbike running smoothly and avoiding costly repairs down the road. The recommended maintenance schedule will vary depending on the make and model of your bike, as well as your riding style. Make sure to consult your owner’s manual for specific maintenance recommendations, and keep a record of all services and repairs performed on your bike. It’s always a good idea to perform routine checks on your sportbike to catch any potential issues early on. This can include checking fluid levels, the condition of hoses and belts, and the general state of the bike’s components.
Engine Oil and Filter Changes
One of the most important components of sportbike maintenance is regular engine oil and filter changes. Engine oil keeps your engine lubricated and prevents wear and tear, while the oil filter removes impurities from the oil. Oil changes should be performed at the intervals specified in your owner’s manual, and you should always use high-quality, recommended engine oil and filters. Skipping oil changes or using low-quality oil can cause serious damage to your engine, reduce fuel efficiency, and negatively impact performance.
Air Filter Cleaning or Replacing
The air filter is responsible for removing dirt and debris from the air that enters the engine. Dirty air filters can cause poor engine performance, reduced fuel efficiency, and even engine damage. Clean or replace your air filter at the intervals specified in your owner’s manual, or more often if you frequently ride in dusty or dirty conditions. Cleaning or replacing the air filter is a simple and inexpensive process that can greatly improve the performance and longevity of your sportbike.
Brake System Maintenance
The brake system is one of the most critical components of your sportbike, and proper maintenance is essential for safety. Regular brake inspections should be performed, and brake pads should be replaced as soon as they show signs of wear. The brake fluid should also be checked and replaced at the intervals specified in your owner’s manual. Worn or contaminated brake fluid can cause braking problems, and can negatively impact the overall performance of your brake system.
Tires
Tires are the only point of contact between your sportbike and the road, and they play a crucial role in handling and safety. Regular tire inspections should be performed, and tires should be replaced as soon as they show signs of wear or damage. Make sure to check the tire pressure regularly, as underinflated tires can cause handling problems and reduce fuel efficiency. Tires should also be rotated regularly to ensure even wear and extend their lifespan.
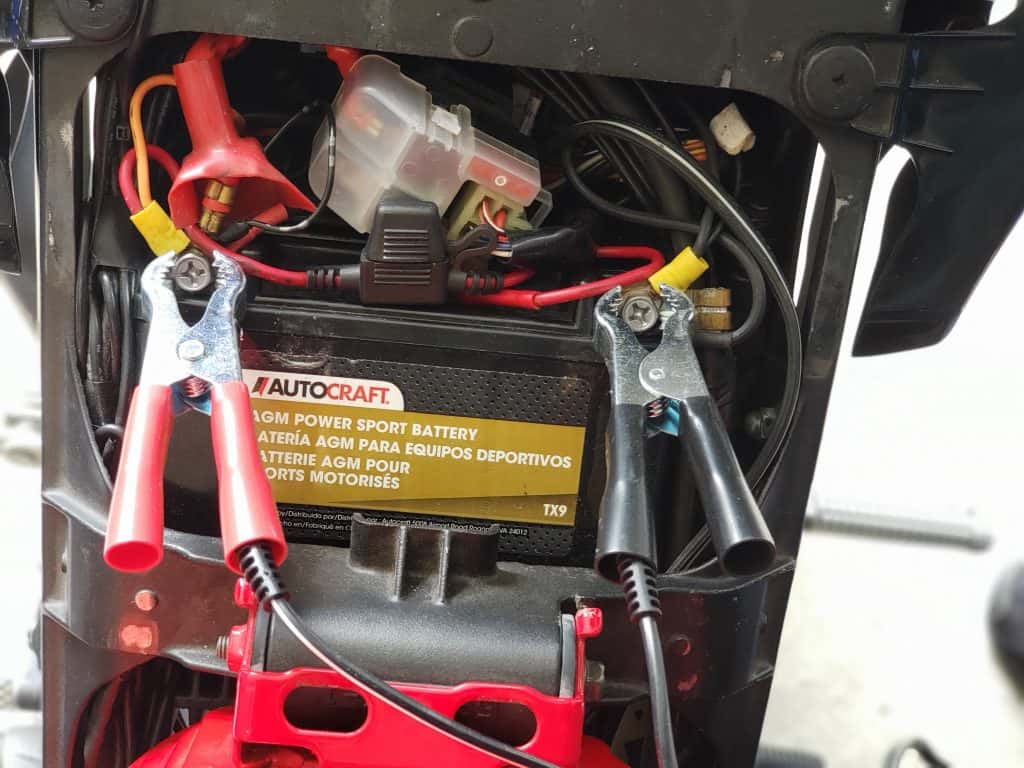
Battery Maintenance
Sportbike batteries can be expensive to replace, and proper maintenance is essential to extend their lifespan. Regular battery inspections should be performed, and batteries should be charged regularly if they are not being used. Make sure to disconnect the battery before performing any maintenance on your bike to avoid electrical problems. A battery that is not properly maintained can fail unexpectedly, leaving you stranded on the road.
Chain Maintenance
The chain is an essential component of your sportbike’s drivetrain, and proper maintenance is essential for smooth and efficient operation. Regular chain inspections should be performed, and the chain should be lubricated at the intervals specified in your owner’s manual. Make sure to use continue high-quality chain lubricant, and avoid getting lubricant on the brakes or tires. A worn or poorly lubricated chain can cause performance problems and even cause damage to other components of the drivetrain.
Suspension Maintenance
The suspension system of a sportbike plays a critical role in handling, comfort, and safety. Regular suspension inspections should be performed, and components should be replaced as soon as they show signs of wear or damage. Make sure to check the suspension settings and adjust them as necessary to match your riding style and the conditions you’ll be riding in. A poorly maintained suspension system can cause handling problems, reduce comfort, and negatively impact your overall riding experience.
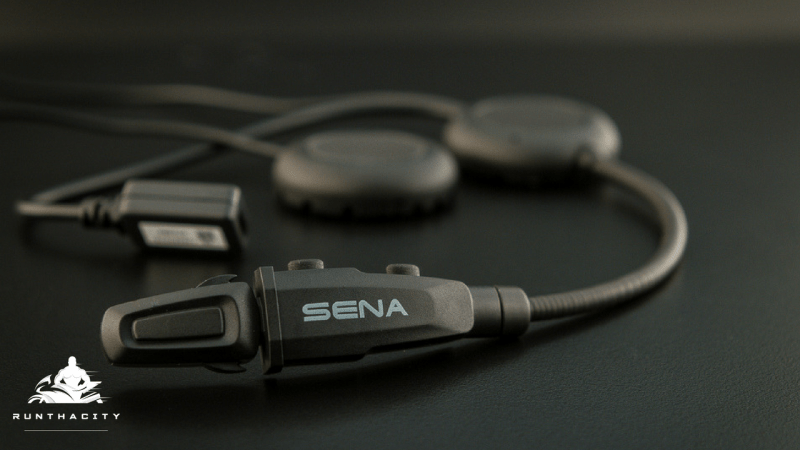
Electrical System Maintenance
The electrical system of your sportbike is responsible for powering all of the bike’s components and accessories. Regular electrical system inspections should be performed, and components should be replaced as soon as they show signs of wear or damage. Make sure to check the battery, charging system, and all electrical connections for any signs of corrosion or damage. A poorly maintained electrical system can cause performance problems, reduce reliability, and even leave you stranded on the road.
Body and Fairing Maintenance
The body and fairing of your sportbike not only protect you from the wind and debris but also give your bike its signature look. Regular body and fairing inspections should be performed, and components should be replaced as soon as they show signs of wear or damage. Make sure to wash your sportbike regularly, and use high-quality wax or polish to protect the paint and prevent fading. A poorly maintained body and fairing can reduce the overall value of your bike, and make it more vulnerable to damage from the elements.
Conclusion:
Owning a sportbike is an exciting and rewarding experience, but it also comes with responsibilities. Proper maintenance is essential to ensure the longevity and performance of your bike, and to keep you safe on the road. By following the tips and tricks outlined in this comprehensive guide, you can keep your sportbike running smoothly, avoid costly repairs, and ensure that your riding experience is as enjoyable and safe as possible. Whether you’re an experienced rider or a newcomer to the sport, taking the time to properly maintain your sportbike is a worthwhile investment in your enjoyment and safety on the road.
-
Viking Moto Motorcycle Backpack Review
Let’s all agree that the biggest problem with our bikes being daily transportation is the lack of hauling capacity.
So, just as in our scholastic days, backpacks to the rescue! But not just any backpack will do. We’re out in the elements, we’re hauling heavier stuff than a few books, and of course, we don’t want to look like a vagabond. That’s where awesome designs like the Viking Bag’s Motorcycle Backpack shine.
This isn’t your high school backpack, oh no. This Cordura backpack features a modern classic look with leather trim and an understated aesthetic that will match your jacket and your bike, no matter what type of bike you like to ride.
Let’s take a closer look at this awesome bag, and how it can make your daily rides so much cooler.
Shot and Edited by Shaun Maddox
https://shaunmaddox.com/
https://www.instagram.com/shaunmaddox/Construction
As I said, this backpack is made of Cordura, a modern marvel of material sciences that fits comfortably on your body, while not being a floppy, frail backpack. With dimensions of 18.5”x12.5”x5”, you can carry groceries, personal items, or personal items with ease and comfort no other bag can offer.
Need more organization, or to haul some electronics with you? Well, Viking’s completely onboard with 21st-century life, including a laptop sleeve and stretchy, sewn in pockets for organizing your styluses, connection cords, your phone, and anything else delicate and vital you may need to carry.
That’s not even the coolest thing this bag can do. We all know how important our helmet is for safety, but when we get off our bike, it becomes a cumbersome nuisance to carry around or somehow safely secure to our bike. With this Viking bag, that’s not an issue, thanks to the stretchy helmet lining which can hold pretty much any helmet of any size no problem.
Gone are any excuses, whatsoever, to forego your helmet. You know who you are!
The Feel
I took one of these out for a day ride, that is about 6 hours round trip, to go shopping in another area (I usually wouldn’t, but it’s a good field test for gear like this). By the time I reached my destination, I almost forgot this bag was even attached to me, and that was with a heavy laptop and backup battery in my bag.
I did, however, notice that as I took the bag off when going into a restaurant, that my shirt was a bit damp, as I’d sweat from where it blocked air flow to an extent. However, having had other bags leave the back of my shirt completely soaked through, I’d call this a considerable improvement in that department. Given this bag is weatherized, it kind of can’t have the airflow of something mesh, and I’d rather sweat a tiny bit while having my stuff protected from the elements.
What really caught my attention was the lack of soreness or discomfort across my shoulders, neck and upper back. I’m a broad-shouldered fellow, which means most backpacks with any weight, tend to tug on muscles and leave me sore or even numb – the broad design of the straps both across the shoulders and waist, didn’t cause that problem at all.
Pros and Cons
Pros
- This is an attractive bag that doesn’t scream “hobo” or “kid”, with a professional yet casual aesthetic that matches any jacket well enough.
- It’s weatherized, and will protect everything with gusto.
- It’s very comfortable, and the strap designs don’t cause soreness, discomfort or circulation problems.
- I can carry my electronics in an organized fashion – this modern thinking is lost on a lot of biking gear companies.
- The helmet lining does the biking community two great services by making our helmets no longer a nuisance, and eliminating any excuses for anyone to foolishly leave their helmets behind.
Cons
- Being weatherized, you will sweat a little bit, it can’t be helped.
- While attractive, the black may not be everyone’s taste.
- I know a few hefty guys who might find the fit of this bag, adjustable as it is, to be a bit precarious.
ADDITIONAL DETAILS
- Heavy duty Cardura Construction.
- Reflective piping for additional night time visibility.
- Built in helmet hood.
- Fits most 15″ laptops in padded compartment.
- Detailed organizer for your keys, wallet and other small items.
- Protective eyewear pocket.
- Duraflex® buckles throughout for added strength.
- Audio Ready.
- Height and width adjustable sternum strap.
- Aerodynamic molded body.
Conclusion
I like this bag. It’s not perfect, and I can see some room for improvement in variety of color schemes as well as a bit more adjustability in the straps for bigger people. I’d also like to see another model that’s stretchier, for if I have more stuff to haul back.
Nonetheless, this is a nice bag, and if you ride your bike for daily things like I do in decent weather, you owe it to yourself to give a bag like this a try!


One comment on “How Often Do I Need To Change Motorcycle Engine Oil?”