


-

Everything You Need to Know About Shorty Motorcycle Exhausts
The rumble of a motorcycle engine is a sound that stirs the soul of many riders. But sometimes, the stock exhaust just doesn’t cut it. Enter shorty exhausts, a popular aftermarket modification that promises a bolder sound and a sleeker look. But are they right for you? This guide delves into everything you need to know about shorty motorcycle exhausts, helping you make an informed decision.
Key Takeaways
- Shorty exhausts, also known as slip-on exhausts, offer a sleeker look and potentially louder sound compared to stock exhausts.
- Consider increased noise levels, potential performance changes, and legal compliance before installation.
- Research specific exhaust models for your motorcycle to understand performance impact.
- Explore alternative exhaust options like full systems or baffles for additional considerations.
Comparison Table: Shorty Exhausts vs. Stock Exhausts
Feature Shorty Exhaust Stock Exhaust Appearance Sleeker, more aggressive Bulky, standard design Weight Lighter Heavier Sound Louder (may not be legal) Quieter Performance May improve or decrease (research specific model) Consistent, designed for specific motorcycle Cost Varies Usually included in the motorcycle price No products found.
View this post on InstagramWhat are Shorty Exhausts?
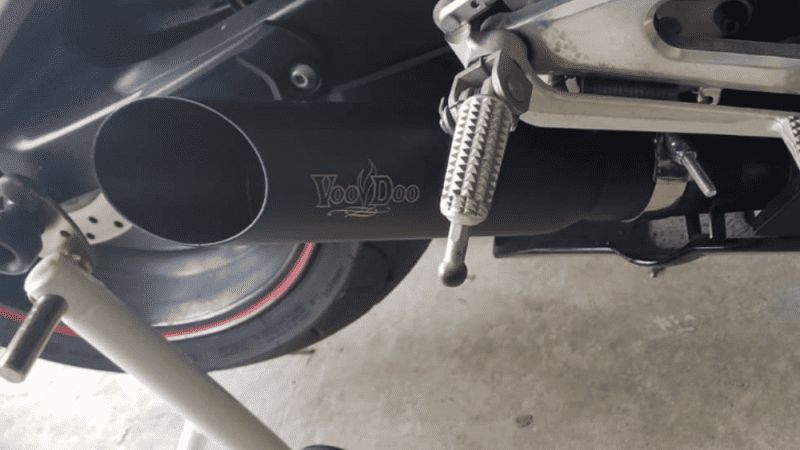
Shorty exhausts, also known as slip-on exhausts, are aftermarket mufflers that replace the stock exhaust on your motorcycle. They are significantly shorter and lighter than the factory exhaust, offering a more compact and aggressive appearance. However, it’s crucial to remember that they are often louder and may not comply with noise regulations in all areas.
Why Choose a Shorty Exhaust?
Riders choose shorty exhausts for several reasons:
- Enhanced aesthetics: Shorty exhausts can significantly improve the look of your motorcycle, giving it a more customized and aggressive appearance.
- Lighter weight: The reduced size and weight of a shorty exhaust can contribute to a slight improvement in handling and performance.
- Potentially louder sound: For some riders, the deeper and louder sound of a shorty exhaust adds to the riding experience.
No products found.
Things to Consider Before Installing a Shorty Exhaust:
While shorty exhausts offer potential benefits, there are also drawbacks to consider:
- Increased noise: As mentioned earlier, shorty exhausts are often significantly louder than stock exhausts and may not be legal in all areas. Always check local regulations before installing one.
- Potential performance changes: While some shorty exhausts can improve power delivery, others may negatively affect performance due to backpressure changes. Researching specific models and their impact on your motorcycle is crucial.
- Potential for increased heat: Due to their shorter design, shorty exhausts may direct more heat towards the rider’s legs. Consider this factor, especially for long rides or hot climates.
No products found.
Installation:
Installing a shorty exhaust can often be done at home with basic tools and mechanical knowledge. However, if you’re not comfortable doing it yourself, it’s recommended to seek professional help from a qualified mechanic. The provided reference (How To Install A Voodoo Slip-On Exhaust) offers a helpful guide on installing a specific shorty exhaust model.
The Final Verdict
Shorty exhausts offer a unique combination of style, sound, and potential performance gains for motorcycle enthusiasts. However, it’s essential to consider the potential drawbacks, such as increased noise and potential legal implications, before making a decision. Remember to prioritize safety and ensure your chosen exhaust complies with local regulations.
Additional Considerations:
- Legality: As the provided article mentions, exhaust modifications might not be legal in all areas. Always check local regulations to ensure compliance.
- Performance impact: While the article mentions potential performance changes, it’s important to note that these can vary depending on the specific motorcycle and exhaust model. Consulting a mechanic or researching specific exhausts for your motorcycle is recommended for a more accurate assessment.
- Alternatives: Shorty exhausts aren’t the only option for modifying your motorcycle’s exhaust. Consider researching other options like full exhaust systems or muffler baffles to find the best fit for your needs and preferences.
By carefully considering all the information presented here, you can make an informed decision about whether a shorty exhaust is the right choice for your motorcycle.
No products found.
6 FAQs About Shorty Exhausts
1. Will a shorty exhaust make my motorcycle faster?
Not necessarily. While some shorty exhausts can improve power delivery, others might negatively impact performance due to backpressure changes. Researching specific models and their impact on your motorcycle is crucial.
2. Are shorty exhausts street legal?
It depends on local regulations. Shorty exhausts are often louder than stock exhausts and might not comply with noise ordinances in some areas. Always check local regulations before installing one.
3. Can I install a shorty exhaust myself?
Installation can often be done at home with basic tools and mechanical knowledge. However, if you’re unsure, seek professional help from a qualified mechanic.
4. What are the alternatives to shorty exhausts?
Consider full exhaust systems for comprehensive performance upgrades or muffler baffles for a slightly modified sound without significant visual changes.
5. How much do shorty exhausts cost?
Prices vary depending on the brand, model, and material. Expect to pay more for well-known brands and high-quality materials.
6. Where can I find shorty exhausts for my motorcycle?
Many motorcycle parts retailers and online stores offer a wide variety of shorty exhausts. Ensure the chosen exhaust is compatible with your specific motorcycle model.
No products found.
-
The Best Stretching Exercises for Sportbike Riders
Riding a sportbike can be an exhilarating experience, offering a sense of freedom and excitement. However, it can also be demanding on the body, particularly on the muscles and joints used most during rides. To ensure both safety and enjoyment while riding, incorporating stretching exercises into your routine is essential. Below, we outline the best stretching exercises specifically designed for sportbike riders, aiming to enhance flexibility, reduce muscle stiffness, and prevent injury.
Key Takeaways
- Stretching improves flexibility and range of motion, essential for comfortable and safe riding.
- Regular stretching can prevent muscle stiffness and soreness, particularly in areas heavily used during rides such as the wrists, shoulders, and legs.
- Incorporating exercise stretch bands can enhance stretching routines, offering resistance that can help improve overall flexibility.
Comparison Table: Stretching vs. No Stretching for Sportbike Riders
Criteria With Stretching Without Stretching Flexibility Improved Decreased Muscle Soreness Reduced Increased Injury Risk Lowered Elevated Riding Comfort Enhanced Compromised Recovery Time Shortened Lengthened Why Stretching is Crucial for Motorcycle Riders
Before delving into the specific exercises, it’s important to understand why stretching is so beneficial for motorcycle riders. Stretching can improve range of motion, decrease the risk of muscle soreness and injuries, and enhance your overall riding experience by keeping the body flexible and prepared for the demands of riding.
Best Stretches for Motorcycle Riding
- Wrist Extensor and Flexor Stretches
- Purpose: Alleviates wrist stiffness and prevents arm pump.
- How to Do: Extend your arm, palm down, and gently pull the fingers towards your body with the other hand. For the flexor stretch, extend your arm, palm up, and pull the fingers towards your body.
- Shoulder and Chest Openers
- Purpose: Opens the chest and shoulders, counteracting the forward-leaning posture.
- How to Do: Interlace your fingers behind your back, straighten your arms, and lift your chest upwards, feeling the stretch in your shoulders and chest.
- Hip Flexor Lunges
- Purpose: Loosens the hip flexors, crucial for maintaining a comfortable riding position.
- How to Do: Step forward into a lunge, keeping the back leg straight and the front leg at a 90-degree angle. Push your hips forward.
- Quadriceps Stretch
- Purpose: Stretches the front thigh muscles, which can become tight from the riding position.
- How to Do: Standing on one leg, pull the other foot towards your buttock, keeping the knees together.
- Seated Hamstring Stretch
- Purpose: Increases flexibility in the back of the legs.
- How to Do: Sit on the ground, extend your legs, and reach towards your toes.
- Glute and Piriformis Stretch
- Purpose: Relieves tightness in the buttocks and lower back.
- How to Do: Sitting on the floor, cross one leg over the other and gently pull the knee towards the opposite shoulder.
Incorporating Stretch Bands for Enhanced Flexibility
Exercise stretch bands can be a valuable tool for motorcycle riders looking to enhance their stretching routine. They provide resistance, increase the effectiveness of stretches, and help improve overall flexibility. Here are a couple of stretches using exercise bands:
- Band-Assisted Hamstring Stretch: Lie on your back, loop a band around your foot, and gently pull back, keeping the leg straight.
- Shoulder Stretch with Band: Hold a stretch band in both hands, lift your arms over your head and behind your back, stretching the shoulders.
FAQs on Stretching for Motorcycle Riding
- How often should I stretch?
- Ideally, before and after each ride to warm up and cool down the muscles.
- Can stretching improve my riding performance?
- Yes, by enhancing flexibility and reducing muscle fatigue.
- Are there stretches to prevent lower back pain from riding?
- Yes, hip flexor stretches and lower back stretches can help alleviate and prevent lower back pain.
- Why is stretching important for motorcycle riders? S
- tretching improves flexibility and reduces the risk of muscle stiffness and injuries, making riding more comfortable and enjoyable.
- How often should I stretch for the best results?
- Ideally, before and after each ride to prepare your muscles for the ride and to aid in recovery afterwards.
- Can stretching help with lower back pain from riding?
- Yes, specific stretches targeting the lower back and hip flexors can alleviate and prevent lower back pain.
- Are exercise stretch bands beneficial for riders?
- Yes, they add resistance to stretches, effectively improving flexibility and strength in key muscle groups.
- What are the best stretches for sportbike riders?
- Wrist, shoulder, hip flexor, quadriceps, hamstring, and glute stretches are highly beneficial.
- How long should each stretch be held?
- Each stretch should be held for at least 30 seconds to maximize its effectiveness.
Conclusion
Incorporating these stretching exercises into your routine can significantly enhance your motorcycle riding experience. Not only do they prepare your body for the ride, but they also help prevent post-ride stiffness and soreness. Remember, consistency is key to seeing improvements in flexibility and to enjoy a more comfortable and enjoyable ride.
For more tips on fitness and motorcycle riding, check out our Fitness Blog at RunTheCity. Whether you’re a seasoned rider or just starting, understanding and practicing these stretches can lead to a healthier, more enjoyable riding experience.


Hello. We are in the process of building our YouTube Channel, but we are doing well on Facebook. Do you have a Motovlogger list for Facebook. If so, we would love to be on it. ~Momma Badger Find us on FB @ The Badgers and The Biker Lifestyle 🙂
I didn’t see Suburban Delinquent or bakerXderek
https://www.youtube.com/ManBikeSwag
great off road riding adventures